Boston Brown Bread

Okay I know I am early for St Patricks Day.  I actually started this post last year because we had to have St Patricks Day late due to school stuff, and then more school stuff caused me to be late in getting this post written.. But think of it this way..  now you are ready with recipes for St Patricks Day 2012!!  Add this to the Corned Beef post and you are all set!

So here is step one, perfecting brown bread.  Rob loves it.  The kids had never had it until I made it last year.  It was so good.  I will be making it again this year.  I used the same site I got the corned beef original recipe and got the recipe for this.   Here it is.   I have always thought bread in a can was just wrong for some reason.  I liked it and have fond memories of my grandmother bringing out that can and my grandfather complaining about how expensive it was, but eating almost half of said can.  We always got it with raisins.  This one I made has no raisins since Nik doesnt care for them.

Like making the corned beef this can be labor intensive.  But also like the corned beef.  This is much better than the crap you get from the store.  You do need a few ingredients but you can get them at most grocery stores.  I had to look in the organic section of my local Hannafords but was able to find everything we needed in one shopping trip.

Ingredients
Makes one loaf of bread
Butter for greasing the pan/can
1/2 heaping cup of rye flour
1/2 heaping cup of all purpose flour
1/2 heaping cup of finely ground corn meal (must be finely ground)
1/2 tsp baking powder
1/2 tsp baking soda
1/2 tsp salt
1/2 tsp ground allspice
1/2 cup molasses
1 cup of buttermilk
1 tsp vanilla extract (optional)
1/2 cup raisins (optional)

First thing you need to do is figure out your pan situation.  Most recipes call for a coffee can but you can use a couple of regular 14.5 oz cans as well.  I had a pan that I got at a yard sale like a hundred years ago in a box of used cooking utensils.  I had no idea what it was and Rob said, hey you have a brown bread pan..  if you say so.  LOL  Here is said pan.

So the first thing you do with your pan is to butter the inside..  Nik to the rescue.. i know this is a disturbing picture but it makes me laugh..
BUT my pan was not working with the finger method.. so we had to go to the whole uber long sterile Q-Tips I had gotten a few years ago for cleaning wounds.  They are all individually packaged sterile Q-tips and about 6 inches long.. Perfect.

I think it would have been easier to just use cans but Rob wanted the pretty design.  So anyway, butter the pan/can.   And then wrap 2-3 layers of heavy duty aluminum foil around the bottom.

You want to end up with your pan/can looking like this.  Make sure it goes up atleast 1/2 to 2/3 of the way up the pan/can.
Set your oven to 325 degrees to preheat.  Now get your water bath ready.  Take a stock pot that will fit in your oven and fill it about 3-4 inches up with hot water and set it to boil.
Keep it boiling while you get your batter made.  In a bowl mix your dry ingredients and the raisins if you want them.
In another bowl mix your wet ingredients.
Then mix them together.

Then pour no more than 2/3 of the way up the can.  This is important, not more than 2/3s of the way up!  It gets messy if you go too high trust me. 
As I am sitting her working on the post, Rob is trying to convince me that I need to make some right now!  HAHA  he saw the picture and said… ohhhhhhhhhh you should make some!  HAHA

So then you either put your cover on, or wrap it with aluminum foil.  Make sure you poke a hole into the top to release steam.
Put it into the water bath in your stock pot.   You dont want the water to be over 1/3 of the way up the side of the can, so take some water out if needed. 
Put it in the oven and set your timer for 2 hours and 15 minutes to steam.    Here it is once you check it after that time.. and you added more than 2/3s of the way up the can.  Dont do what I did.. just fill it 2/3 or maybe even a little less. HA
It was kind of a blow over and through the little hole.  It made a nasty pasty crap in the bottom of the pan.. so again.. only 2/3 of the way.  Once the toothpick comes out clean you are done.  Now take it out and put it top of the stove and let it set for 10 minutes.  Remove from the water and put on top end up on a cooling rack.   Let it cool for an hour.  Then take out of the pan/can.
Once fully cool it stays for a couple of days in the fridge if you wrap it up tightly with saran wrap.. or in my house it lasts for an hour or two because it gets sliced and served practically before it was out of the pan.  Top with butter or a yummy jam or corned beef, or whatever you want.  SOOOOOO good!
So moist and yummy.   This picture doesnt do it justice (I really need some food photography classes!!).  They look dry in this, trust me it isnt not!  In fact Rob is looking at the picture again and hinting again about making some.  LOL Its that good.  Never buy cannedl, when you can make it yourself.

Happy Steaming!

Zucchini Bread

When I first met Rob he pretty much ate things from a can or a box or from the freezer.   He liked some of the things his mom and Grandmother made but to hear him talk, it wasnt much.  He was a hugely picky eater and it was pulling teeth to get him to try anything new.  He always complained when I would make him try things.   The boys are the opposite.  I made them try new things all the time, from when they were little all the way up until last night.  HAHA.  They have such a wide palate it is scary.

Once Rob started really trying new things though.. a whole new world opened up for him.  He will eat so many new things.. one of his favorite desserts is this.  He was always weirded out by the fact it is sweet and has a vegetable in it.  I love it.  My mom used to make it when I was a kid.  I dont have her recipe but I did find this one and I love it. 

Ingredients
Yield: 2 loaves

3 cups flour
1 tsp salt
1 tsp baking soda
2 tbsp cinnamon
1 tsp nutmeg
1/4 tsp baking powder
3 eggs
2 cups sugar
1 1/2 tbsp vanilla
1 cup oil
3 1/2 cups grated zucchini with the fluid drained off

Cast of Characters

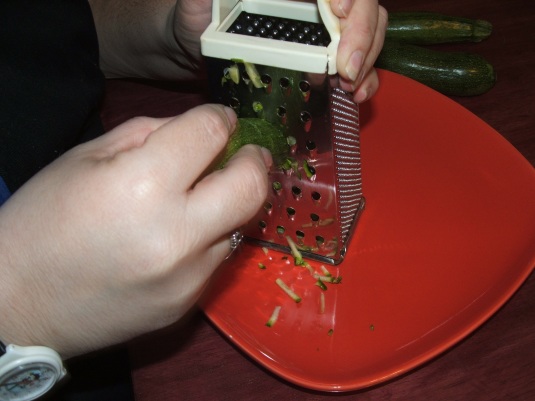
Start off by grating up the zucchini.
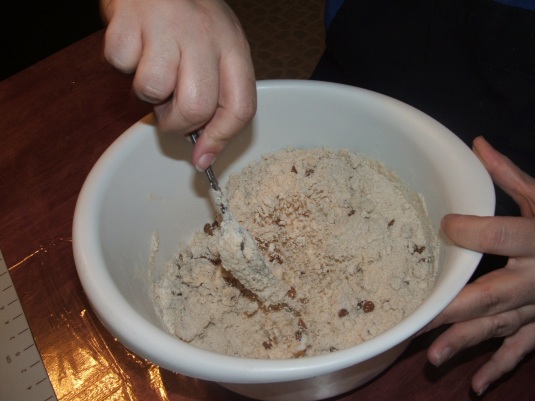
Measure your dry ingredients into a bowl and mix together.

Crack the eggs into a bowl.

Add the sugar and oil.
Mix together the egg, sugar and oil.
 
Spray the loaf pans.

Pour the egg mixture into the dry ingredients.

Then add the zucchini which you can squish all the excess water out of.

Mix all together.

Divide into the two pans.
Bake at 350 for one hour or until toothpick comes out clean.  Take out of the pan after 10 minutes.

So yummy, and the edges get slightly crunchy!  One of my favorite sweet breads..

Cinnamon Scones

Let me just start out by saying that there isnt a pastry that I dont like.  No really, you name it, I like it.  And I have the midriff to prove it.  Bagel, donut, struedel, danish, bear claw or tea cake.. love them all.  But of all the ones I love, scones was not high on the list.  I didnt like how dry they can be or how crumbly but a good flavor scone has always been something I wouldnt pass up. 

I think scones place on my list may have something to do with the fact I am not a dipper or dunker.  I dont like oreos in milk, or donuts in coffee.  I generally dont like soggy breadlike products.   Though tiramisu is pretty darn tasty…..  Scones are often used for dunking, and that just doesnt do it for me.

Then a few days ago, Pioneer Woman had a scones recipe and it was cinnamon.  I adore cinnamon.  And again… pastry.  And I was still on medical leave at this time so it was time to bake..

Ingredients
yield 4 dozen   WW point for each when made mini-3
3 cups flour
1/3 cup sugar
1/2 tsp cinnamon
few grates of nutmeg (1/8 tsp)
5 tsp baking powder (funny story about later)
2 sticks (1 cup) butter
3/4 cup half and half 
1 egg
1 tsp vanilla extract
Topping
1/2 cup sugar
1 tsp cinnamon
1/2 tbsp half and half

Cast of Characters


Start with a medium sized bowl and add your sugar and flour.

Then add your baking powder.  Here is the funny story.  When I got the email from Pioneer Woman, the recipe said it was 5 tbsp, I thought that was alot but I almost always try to do the recipe exact the first time.  We made them and thought they were a bit too much so I went to her site since I was already on it and that said 5 tsp so I figured I had a slap-my-forehead moment and went on with my day.  The next day I looked at the email again.. and it did in fact say 5 tbsp.   She had a typo in her email update.  HA  So dont do what I did, as you can see by the picture from the 5 little piles of baking powder.. LOL   Soo only add 5 tsp of baking powder!

Then your cinnamon and the nutmeg.  Her recipe didnt add nutmeg but I love how it works with cinnamon!

Mix together thoroughly.

Cut in the butter using a pastry cutter or two knives.

Crack an egg into your half and half.  And this a good time to turn your oven onto 350.

Add the vanilla.

Then dump it into a bigger bowl cause you are making a mess otherwise.. haha  Then beat the mixture until it is well mixed.

Add the chips to the flour mixture and combine and then add the wets.

Mix together just until the wet is not visible, do not over mix, it will make them crumbly and tough.

Now turn out onto a lightly floured surface or my pastry board.  Like the perspective shot, Rob is very proud of it. 

Form into the shape you want, I did a rectangle because I knew I wanted mini scones.

Next mix up your crumb topping, you can omit this and they will still be fantastic but this adds some crunch and a touch of sweetness.  Add the cinnamon to the sugar in a small bowl or coffee cup.

Add the half and half.

Mix until crumbly.

And put over the top of a rectangle, trying to be even.  Cut into the size and shape you want.

Rob trying perspective shots again.  I think he is trying to be like Millie and see up onto the table?   Or maybe he is the perspective of the baking sheet??

Gently lift off the pastry board…

And arrange so they are not touching on the baking sheet.  They will expand some but not too much.

Into the oven for 18-25 minutes depending on the size.  These came out after 18 minutes.    Serve with milk or coffee or tea… or as you are walking out the door, or in the door, or by the handful as the kids did.

Even though these had 3 times the baking powder needed they were VERY good.  Because I am on WW and trying to be good, I only had maybe, 4.  I made them on a Wednesday.  They were gone by Friday afternoon.   Rob had none (doesnt like alot of cinnamon) so that means the kids had 3 1/2 dozen in two days.  

Other than the mess up with the baking powder.. I wonder how many others did the same thing and went by the email?….  these were a nice treat and a huge hit in my house.   I hope you enjoy them.

Happy Baking!!

Banana Bread and the Power of Family

Most recipe books will have one or two recipes for Banana bread.  It is one of
the original recycling ideas in my mind.  It uses something that some would consider having gone bad.   In my house, if the banana has a bit of brown on it, it is relegated to banana bread.  I am the only one who will eat them once they are even slightly less than yellow.  Hell Aaron prefers them slightly green! 

Banana bread is one of the most frequently made quick breads so when I was trading recipes with a friend this was one of the ones she told me about.  I met Janice 8 years ago and as we are both foodies and love to cook we hit it off quickly.  She is Italian and I love how she says thing like mozzarella and ricotta.  We would get together and cook and chat and go shopping.  But most of all we talked of family, and cooking and food.

One day when we were over she told me she had to make some banana bread to use up some over ripe bananas so I told her how I had always used the banana bread recipe my mom had in her Betty Crocker cookbook.  It was yummy and my favorite.  Janice told me of her moms recipe.  She had been making it for years and it was very much a family favorite.  I asked if she would share, knowing that alot of cooks dont share family recipes.  She said sure.

Then she started making it.  I was skeptical.  The method was odd but I figured what the heck, I would atleast try it.  I dont want to spoil the surprise by telling what the secret to this bread is but let me tell you, I have never ever, nor will I ever, use another recipe.   The chunks of banana and the wonderful flavor and richness has made this my family favorite.  With me being in school I dont get to bake or cook as often as I would like but the kids like it so much they make it all the time.  In fact for this blog update, Nik is the one making it, I am the camera lady and he is the baker.

When I told Janice I wanted to post this on my blog and I was wondering is she would mind, she reminded me that this was her moms recipe.  Janices mom died a few months ago and Janice was still reeling from the pain of it.  I was so happy to be able to honor her mom in this way.  You see, I feel that there are certain things that bond you together.  For Janice and her mom, one of the things that bound them was the love of cooking and baking and being in the kitchen.  Maybe it was the Italian in them but when Janice talks of food, she talks of family. 

I have found that is the same in my life.  My mom and I have had an odd relationship over the years and have gotten much closer in the last couple.  One of the things we have always been close about was cooking.  I can remember baking dozen upon dozens of cookies just about once a month.  I mean like 20-30 dozen cookies!  And canning hundreds of jars of tomatoes, relish, corn, and beans with her in the summer.  We made dinners and bake cakes and still call each other up when we have made something particularly awesome. 

 Janice and her mom Janet Angiollo were like us.  Food bound them together.  I am working on that tradition with my boys.  And I love teaching to cook.  I am teaching the boys and teaching Aarons girlfriend Corrie too.   Janice learned at the hands of her mom and she taught whomever would listen, just like me.  So this recipe and it is odd, fun and amazingly  moist outcome are a true tribute to one special lady, Janet Angiollo.  I know she is looking down on Janice with pride at the great woman she raised and the traditions she is passing on, to her kids and to her friends.

Ingredients
1 large loaf    recipe by: Janet Angiollo

3 ripe bananas
1/4 cup softened butter
1 cup sugar ( I use half white and half brown)
1 egg
1 tsp vanilla
1 1/2 cup flour
1/2 tsp salt
1 tsp baking soda

The Cast of Characters (for a triple batch, we had a ton of bananas) Ignore the oil.. Nik had that out and I wasnt thinking and got the ingredients all arranged.  HAHA  I am not perfect..

Preheat your oven to 350.  Prep your pans by greasing them.  PUT YOUR MIXER AWAY.  This is important!  You MUST do this part.

Break your butter up into small chunks.
Then your bananas. 

Sprinkle your sugars over them.

Add your vanilla on top of the sugar.

This time I added a touch of cinnamon.  I dont always and it isnt in the recipe, but I was feeling cinnamon-ey. 

Sprinkle the soda around.

Then the flour, still not mixing it.

Then the egg (or for this case the eggs since it is tripled). 

Now that you have all your ingredients in place, layered on top of each other, here comes the most important step.  You ready for it? 

Go wash your hands again.  And yes I said again, cause I KNOW you washed them before you started!

Now comes the fun part.  This is why you dont need a mixer.  You get to use your hands.  This seems to make the difference.   I was so weirded out the first time I made this recipe at home I used my hand mixer.  It was good but not great.  The banana was all thoroughly mixed and just wasnt the same. 


Mix until it is all combined and then mix a bit more breaking up some of the larger chunks of banana and make sure that the butter is not in large pieces.

Pour into prepared pan(s).

And bake until golden brown and a toothpick comes out clean, about 45-60 minutes depending on your pan size.

Let warm slightly before you remove from the pan and slice in thick slices.  Serve with butter, or jam or plain.   Just look at those fantastic chunks of banana in it.  So good….

 This is true comfort food.  And elicits memories of cooking with my mom, and Janice and now my kids.  This is a fun recipe and one that is very easy to make with your kids.  We have done a couple of variations too.  We substituted the butter with peanut butter and made Elvis bread, get it PB and Banana!  You can sub 1 of the ripe bananas for 1/3 cup of crushed pineapple.  As mentioned above we add cinnamon sometimes.  Make this the way you like but remember two important things, never use a mixer and that family cooking is the most gratifying and tasty way to cook. 

Happy Baking!!!

And thank you Janet!