Corned Beef from Scratch

Corned Beef is a favorite in this house.  No two ways about it, Rob, Nik and Aaron would eat it every day.  No exaggeration.  I even have two in the fridge right now.  These pictures are from last summer and a whole batch of recipe pictures I found.  So the next few posts will have a ton of pictures!  Anyways…… like I was saying, they love the stuff.  So I came across this posting last spring a week or two before St Patricks day.   With some of the special ingredients and the fact it has to brine for 10-14 days, I knew it wouldnt be ready before the holiday so I put it aside.  We had our traditional St Patricks Day meal and that was it.. or so I thought.  The idea was stuck in my head.  I was in trouble.  It was stuck in the brain.. no getting away from it now.  So I jumped on to the google to find and buy the hardest to get ingredient.

“Pink curing salt, or sodium nitrite, goes by many names, such as Prague Powder #1 or DQ Curing Salt #1” (this is the quote from the original post, I need to give credit here) was hard to find.  Here is the link to where I got it online, dont take the 4 hours of research to make sure you have the right one, best price, etc.  Just go here or amazon, which will link you back to the site anyway.  I bought the lb package, which is no longer available, and we have made corned beef 5-6 times and hardly dented the bag, so a 4 oz bag should be enough for someone to just start off.  Anyway, this is what makes the corned beef pinky-red.  If you dont care if it is pinky-red or prefer gray corned beef you can forego the specialty item.  We happen to like it and the gray looks funny to me.   There I said it.  I am a corned beef snob.

I will warn you though, while this is totally worth it, it is not a recipe for the impatient.  Though this did teach me how to be patient, corned beef is not something you can whip together on a Sunday and have for dinner that night.. you might be able to have it a couple sundays away but it is something that takes patience and some fridge space to make.  And there are three steps.  BUT it can be prepared in an hour or so and put away in the back of the fridge for 10-14 day (or even longer I am sure but I have only been able to get Rob to wait 11 days.. I am hoping for two weeks on this batch.

First you have the make the spice mix.  We tried to traditional one that was on the original site but have since increased and decreased some ingredients to get the flavors we like.  Here is our spice mix.

Ingredients for the spice mix
Makes enough for 3-4 corned beefs but it stores forever so I wouldnt just make the whole batch.

1 Tbsp whole allspice berries
1 Tbsp whole mustard seeds
1 Tbsp corriander seeds
1 Tbsp red pepper flakes
1 Tbsp whole black pepper corns
2 tsp whole cloves
12 cardamon pods
3 inches of cinnamon stick broken into smaller bits
10 bay leaves crunched up
2 tsp ground ginger

Get all your ingredients together and get a medium frying pan.  A square sided pan would be better but i used a sloped sided to get better pictures.  Measure out everything but the ginger.


Put the spices in the pan and brown over medium heat until you can hear the mustard seeds start to pop.

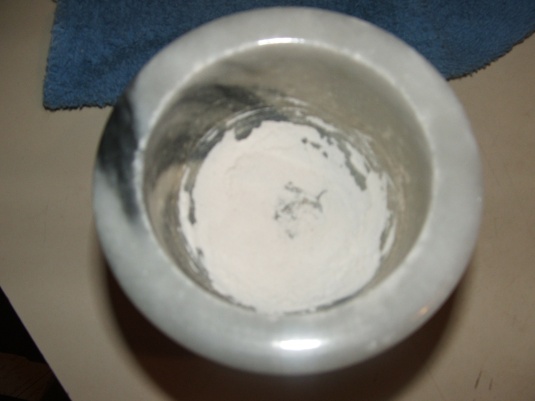
Once toasted and you can smell them getting toasted put into your mortar (or if you dont have one, let them cool a bit and put them into a zip lock bag) and using the the pestle break up into smaller pieces.

You now have your spice mix.  Add the ginger and put aside.

Now for the meat.  What you normally buy for St Patricks Day is corned beef brisket but you dont have to corn just briskets.  In fact, plain brisket can be expensive.  In fact other than I MUCH prefer our homemade ones, making it yourself is more expensive than buying it already made.  I thought that was funny myself.   Anyway.  We have only corned (and this type of preserving and brining meat is called corning it) brisket and eye round.  We really prefer the eye round because it is so lean.   You have to get a thinner eye round, meaning not more than 5 inches in diameter, or you can get a thicker one and just use a meat tenderizer and pound it a bit thinner.   We usually buy brisket if we are serving it to someone else because alot of people like the fattiness of the brisket.  We are currently brining an eye round and another roast we had in the freezer, not really sure what type it is.  It is round and has a string around it. The men in this house aren’t picky, its meat and it is being made into corned beef.  They will eat it.

Making the brine

Ingredients for the brine
The original recipe was for a gallon.  We only make 1/4 gallon and can do 2-3 pieces of meat at a time in a ziploc bag, so this is for only 1/4 gallon but if you need more, just make some extra.  This is what works for the gallon size ziploc.
2 cups water + ice to make 4-4 1/2 cups
1/2 cup canning salt or sea salt (DO NOT use kitchen/table/iodized salt)
2 tsp pink curing salt
2 Tbsp brown sugar
2 Tbsp of brining spice

This is what the salt looks like in the package, like pink granules.  And it has a weird almost wet texture.

Bring all your above ingredients to a heat where the sugar and salts have melted .  Add 2-3 cups of ice cubes so that you have a total of 4-4 1/2 cups of brine.   DO NOT add to the meat until it is cold.
Now you have the corning brine.  Put your brisket, etc into a large bowl with a cover and cover the meat with the brine, or into gallon ziploc bags and then divide the brine up making sure you divide up the seasonings as well.  Let it sit for a week to two weeks in the fridge.

Dinner Time!!  You have waited your two weeks (okay atleast a week) and it is time to make your dinner!  Ready for the fun yet?  Take the meat out of the old brine and rinse it off.  No need to get all the old spice bits but you dont want the salty brine anymore.  That can go.
It will have this weird sheen to it.  That is normal.
Make a spice bundle with cheese cloth and 2 Tbsp of your remaining spice mix.
Put in a large pot with water, bring to a boil, turn down to a medium simmer and cook for 3 hours.    I usually have to add a bit more water somewhere in the middle.
After the three hours of a medium simmer, add your veggies.  For us I wash 3 lbs of new potatoes, 3 lbs of washed carrots (Rob LOVES carrots, so you could probably get away with just a lb or two), 2-3 peeled onions, a quartered cabbage and one turnip in large chunks.  Boil until all veggies are tender.  Drain and serve with butter.  And brown bread.  Which I will be posting in a couple days..
I love this.  I mean, yes it is labor intensive. I mean even writing this took a year.  Okay I am exaggerating but it did take forever.. but it is so worth it.  We have it every few months and it is so good.  I would love to make it more often but dont want to ruin the specialness of it! HAHA  Anywho.. If you dont try it, I hope it has struck a cord to try making new things..

Happy Cooking!

Use and Care for a Mortar and Pestle

I love my mortar.  Not sure why.  It sat in my kitchen for years and was not used.  It moved with me to 4-5 new places and never was used.  Then I married Rob.  He asked why I didnt use it, I had no intelligent reply so I started using it.  I can honestly say that it is only used for a few things but now that I am branching out in my cooking I will be using it for more. 

The task we use it for most is grinding up pepper and other spices.  I love how it smells now, all warm and inviting like I am in a spice shop.  I used it recently in my meatballs recipe and promised to show you how to use it and how to clean it.   So here goes.

Use, is easy.  You use it to grind up pepper, cinnamon stick, or to muddle other dried spices into powder.  I use it to ground up my oregano, basil and other spices if i dont want alot of flaky bits.  But Aaron will demonstrate with grinding pepper.

Cast of Characters

First take your prescribed amount needed.  Say you need 1 tbsp of pepper.  I would measure out ab0ut 1 1/2 tbsp of peppercorns and put them in the mortar.
Steadily apply pressure to start breaking them up a bit.
Then wrap a towel or a washcloth around the pestle and holding it down you can start really pounding on the peppercorns.

Swirling motions work as well.  Once you have gotten most of them cracked and ground a bit, you can take off the washcloth and then finish up to the fineness you need. 

Clean up was always one of the reasons I didnt use it often, the flavors would mix cause I wasnt cleaning it correctly.  Again my dear darling smart husband corrected me on that.   You clean it with uniodized salt.

Start with putting a tablespoon or two of salt in the mortar.
Grind it around all the surface that needs to be cleaned.

And grind and grind until it is a powder…..

Empty and then repeat.  Its that simple.  I use this for when I am making large batches of salsa and it requires 3 tbsp of pepper.  I dont like it already ground, you cannot taste the spice to it, it is just there but when you grind it yourself.. the warmth and the smell permeates the house. 

I would like to thank Aaron and Nik who are generally my mortar and pestle men!  I can say that I dont know too many kids out there who can use one.. leave it to my boys to know how. LOL  Though Millie says she would like to learn but she has no thumbs.  Look at her.. she wants to learn..

Organizing the Spices

I love spices. I have alot of spices.  I mean alot.  I have all my huge industrial size ones and then I had smaller amounts of ones I dont use as frequently.  I get most of my spices at the local food co-op in Middlebury VT when I go home to visit my Mom.  Bulk spices are wonderful.  They are fresher than most you get in the store and you can buy a little or a lot, and they are almost always cheaper!  Until now I could only get them in Middlebury.   BUT I recently found out that they have a small selection at A Market right here in Manchester.  This is probably not a good thing to know. 

I have a box that I keep all my spices in.  It has cans of boullion and extracts and this terrible bag full of bulk spices that makes a huge mess.  So last week when I had a bit of extra money, I used some to buy some jars from this site that sells glass, plastic and metal containers.   They came today.   Here is what I did.

I went from this…..

to this…..

Ahhhhhhhhhhhh so happy.  I love organizing…

Happy Cleaning Up!!

Taco Seasoning

I have yet to find a taco seasoning that really does it for me in the stores.  Rob, Nik and Aaron love tacos, fajitas, enchiladas (well Rob doesnt like enchiladas but the boys and I do) and taco salad so not having a good seasoning was kind of annoying!  Okay it wasnt that big of a deal but we decided to make our own and took a couple recipes and did what we always do, made it our own.  

Here is what we came up with.  This is easy, you can halve it, double it, do what you want with it but this is what works for us.  We sometimes like it a little spicier so will add a touch more cayenne or chili powder.  I personally love the amount of cumin in this one.  I think that cumin is an under utilized seasoning.  It is smoky and robust and works with almost every meat, as well as with many sides. 

This recipe is called taco seasoning but you can use this for anything “mexican”, like the aforementioned fajitas, salads and enchiladas.  My personal favorite is a taco salad.  Romaine lettuce, a scoop of meat (we add corn to our taco meat), some shredded colby and monteray jack, diced onion and some green and red pepper.  A dollop of salsa on top and you are good to go.  This is making me hungry..

Ingredients
adapted from allrecipes and some magazine, maybe Better Homes and Gardens
1/2 cup dried minced onion
1/2 cup chili powder
2-3 tbsp cayenne pepper (this is if you like it hot)
1/4 cup kosher salt (definitely adjust to your tastes, I have low blood pressure so salt has been okayed by my doc)
3 tbsp corn starch
2 tbsp dried minced garlic
3 tbsp cumin
1 1/2 tbsp boullion granules (I use beef in mine, go with veggie or chicken if you prefer)
2 tbsp dried red pepper flakes
1 tbsp dried basil

Cast of Characters
All the spices and seasonings in a row…. clockwise from the top; cumin, crushed red pepper, beef boullion, dried onion, salt, chili and cayenne pepper, cornstarch, dried garlic and the middle is the basil.

Mix and pour into your favorite jar, in my case, a mason jar.

All ready for taco making…….. 

To make tacos, just shake the jar to evenly distribute, add 1/4 cup of seasoning and 1/3 cup of water to each pound of drained meat.  You will need a bit less if not using ground meat (ie., chicken or beef sliced) since you wont need as much sauce.    Fill a tortilla, taco shell or dollop on top of your salad.  The great thing about making your own taco seasoning is that it is versatile.  You can change this to how you want it… go ahead.. its okay.. I wont mind, I promise.  

Happy Cooking!!

Homemade Cheese Its

You remember me talking about how we like to make things from scratch that are easier to buy.  Well Rob came across this recipe in his Ready Made magazine for home made Cheese Its (yes i know they aren’t spelled like that but I have no idea about copyrights on names) and I had to try them.   BUT they were way too high in points for WW so I tweaked.  Are you surprised??  If you are, you havent been reading my blog enough.  Haha.

The original recipe calls for only 5 ingredients.  I added a couple.  First of all I changed the cheese to low fat.  I KNOW, the sacriledge!!  Cheese is the epitome of yumminess and to a dairy farmers daughter anything that uses milk is essential to life.

I love cheese crackers.  I love the taste, the texture, and goodness knows I love me some cheese.  I think that has been the hardest part of WW has been giving up cheese and its products.  You can eat whatever you want on WW but honestly 1 oz of cheese can be 2-4 points.  That is alot of points for such a small amount, so I have been sparing.  This recipe, makes about 15 dozen!!  which when points are added up.. is only 2 points per dozen!!! Yeee Haw

Ingredients
yield: 15 dozen   adapted from Ready Made magazine
1/2 stick butter
6 oz low fat sharp cheddar
2 oz hard italian cheese (pecorino is what we had in the house)
1 cup flour
1 tsp salt
1/2 tsp garlic powder
2-3 tbsp cold water

Cast of Characters

In your stand mixer, add the butter.

Grate cheese into the mixer.

Add the salt.

Beat the butter, cheese and salt on medium until incorporated.


Add the flour.

Mix until the consistency of coarse sand.

We decided to add some garlic powder at the last minute.

Slowly add water 1 tsp at a time while on medium speed……

Until it comes together.

Here is where I will tweak the recipe the most in the future.  The recipe calls for putting it in the fridge for an hour.  I will NOT be doing that.  It made it hard to roll out.   I ended up having to knead it a bit to soften it up.  So next time Iwill just cut it in half and roll away. 
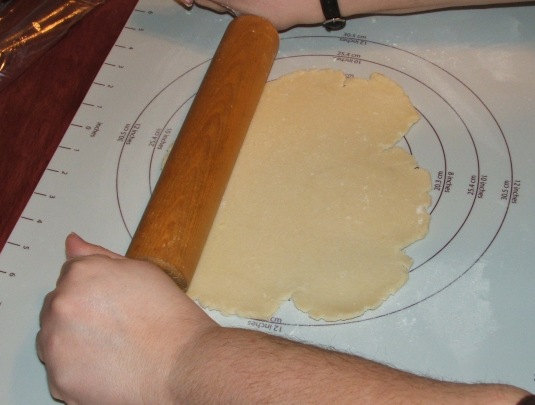
So start off with a lightly floured surface.  I love my Pampered Chef roll mat, barely have to use any flour.

Pat half the dough into a disk.

Roll it until it is thin.  The recipe said 1/8 but i dont think that is thin enough.  So I would roll it as thin as possible.

Cut with a fluted roller or even just use a knife if you dont have a rolly thingy.

Take off the not pretty edges to roll out later.  Here is what they will look like.  See how they are not even.. I love that about homemade.

Put on a parchment lined baking sheet and poke the center out with a chopstick.  This will help them from puffing too much.

Bake at 375 for about 15-17 minutes.  These were in for about 14 minutes.

I think they like them…..

Even Rob who hasnt been feeling well enough to eat real food for 5 days, couldnt resist them. 

The results.  Well they were soooo tasty but a bit thick.  They called for rolling 1/8th an inch thick. I will go thinner next time and bake a little less time AND I will definitely use my Pampered Chef stoneware so they dont burn.  But they were so good and actually pretty fun to make.  As you can see by the masculine hand in some of the pictures, Nik made these with me and we totally had a great day baking and chatting.  Rob was in bed, until he smelled them done and had to sample, and Aaron was at Corries house so this was a fun project for Nik and I.  Granted I think I have about 4 dozen left after Rob and Nik finished but it was so worth it. 

Happy Baking!!

Homemade Vinegar Part 2

Morning All..

So today we are doing an update on our Vinegar that we started the blog with.   Homemade Vinegar Part 1 is our third try at homemade vinegar.  So far Rob says it is working.  We have created a mother.  I tell him that it looks like a dirty jar. 

He assures me it is a mother.   Here is his explanation…   “what happens is  when you put a vinegar mother into wine it will float on top, then as the mother eats all the sugars in the wine it will sink and what is on top is vinegar.  So, right now the mother should be on the bottom of the jar with the vinegar on top”

So in theory there is a mother on the bottom….

Still looks like a dirty jar.   So now we are comtemplating who will be the daring one and try the fluid to see if it is vinegar or just nasty cheap rotten wine.  Rob doesnt like wine or vinegar and I am scared.  This conversation and negotiation went on for a couple minutes.  Then Nik was walking  by and heard us talking about it.  He said “I’ll do it”.  He does have an iron stomach.  And he is the healthiest one in the house right now.  Hmmmmmmmmmm how bad parenting is this. Then he said “cmon Mom.  I love vinegar!!”     So here is how it went.

He was actually excited to try it..
Then the try….

Then the face that shows the result..

Sooooooooooooooooooooooo this was fail #3.   Robbie thinks it is because the wine didnt have enough sugar in it.  And when he scraped the bottom there wasnt much mother in it, if any.   Buying this would be much cheaper, but it makes the hubby happy.. keeps him busy and out of my hair…. and as any wife will tell you.. that is worth quite a bit in itself.

Happy Failures!!!

Attempt at Homemade Vinegar

Rob and I love making things that are easier to buy at the store, ourselves.  Some say this is cool, others say this is just us being gluttons for punishment.  Plus this is my first post, so thought it would be an interesting one since we can now have this be ongoing..

First of all, a thing about vinegar.  Vinegar is the biproduct of a fermentation process.  A large gnarly disc of a yeast, called a mother will eat all the sugars in wine and the biproduct is vinegar.   To make your own vinegar you need a mother.  You can buy them or you can  make your own but you cant use standard vinegar.  It has been pasteurized to kill the mother.  So you need to find an unpastuerized one. 

Now you may ask why you would want to make your own vinegar.. Again see above.. we are gluttons who want to be able to play.. so this is what we did.

So here goes.  This was actually our third attempt.   The first was en epic three month fail..  the original vinegar had been pasteurized.  The second we had used this vinegar but had listened to someone who told us to aerate it.. and we got a mother but she was a moldy mother.  Not good to eat.    So dont try this until we have reposted if it worked!

  First of all the ingredients. 

Red Wine Vinegar
1 open topped gallon jar
2 bottles red wine
1 cup unpastuerized vinegar
cheesecloth
rubberband

First off… the ingredients.

Make sure that you have thoroughly washed out your jar with alot of hot soapy water and rinsed well.    Then add the cup of vinegar.  We used one we got at a farmers market.

Then add your wine.  We used a kind of, hell VERY cheap wine from Walmart.  It was a whopping $3 a bottle.    Once we are sure this will work we will use a better type but we didnt want to waste a good bottle in case this became Failed Attempt 3. 


Cut the cheese cloth so that is able to be folded into 4 layers and still fit over the lid of the jar.   Then secure with a rubberband.

Viola… your finished product should look like this.

Now find a room temperature place, with out too much direct sunlight that will not be disturbed too much!   Let is sit for 2 weeks then check on it. 

We will post again when we have checked it and update for you all..

Thanks for reading..

Kim