Whats in a name….

well change in my case.  I was sitting here today and realized I didnt like the name of this blog.   I think that this place will be about more than just food.. at some point it might be stories about my patients, my patience and other passions I have.  So this is what I came up with.  I am not a housewife in the purest sense, but I am one at heart.  I am a Part Time Housewife.  For now, this is me……

 The louder roars will come later!

Baked Ziti with Sausage

I usually like to make most things from scratch, my own spaghetti sauce being one of them.  I am in school and dont have time to breath so spending an afternoon making sauce isnt really in the plans for right now.  So I “cheated”.  I used can sauce to make this dish.

Let me lead off by saying that baked pasta doesnt really do it for me very much.  I dont like how the middle turns gelatinous and the edges get crispy.  Not something I like usually.  BUT two weeks ago I was in a meeting for something for the kids and met this woman named Stephanie whom I find out had just lost her home and all her belongings in a house fire and she and her husband are living in a hotel, eating out every night.  This sounds like torture to me so I offered to make her a casserole or some sort of a home made meal.

Well lo and behold, she took me up on it!   When I didnt hear in the first week I figured she assumed I was not serious and forgot about it.  I got an email last week asking if the offer still stood!  Of course it did.   I wouldnt have offered if I wasnt serious.  Unfortunately I was back in full swing of school though and wouldnt be able to put as much time into this as I would have liked to.  SOOOO here is my solution… Baked Ziti.. easy peasy, fast and easy!   This made two 9×13 casserole dishes.  We gave the one away and will have the other tonight for dinner. 

Ingredients 
2 boxes of your favorite pasta
1 large onion
1 large green pepper
4-5 cloves garlic
3 lbs of italian sausage, sweet or hot or a combination
3 cans of your favorite sauce (Rob likes the cans of all the store sauce)
1 can of crushed tomatoes
Some sweetener if you like the sauce a bit sweeter, I used two Splenda
Salt and pepper
2-3 tbsp Italian seasoning
2-3 tbsp Parmesan cheese or in this case some of a parmesan and garlic mix
Shredded cheese (I know, I know, I said in other posts I never use this.. well I do when I am in school!)

I am totally missing the veggies in this picture…. it was 7 am what do you expect!

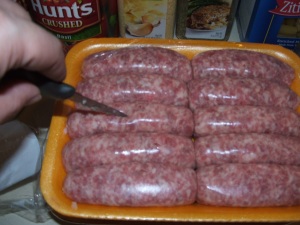
Start off by poking each sausage with a hole. 

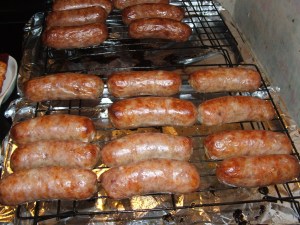
Then set up your sausage baking rack.  We always bake our sausage.. so much less fat this way.  Simply line a pan with aluminum foil and put a tray on it.. arrange your sausage and bake for 35 minutes on 350.

Now peel your onion and garlic and seed your pepper and chop it up fine with a mini processor.  I generally prefer chunks but both Stephanies and my husband prefer no chunks in the sauce.. hmph!   Get them sauteing in a lightly greased dutch oven.

Check on the sausage which is now making the house smell yummo.  Give them a couple more pokes with a knife so that the fat can drain out of them and onto the aluminum lined pan.

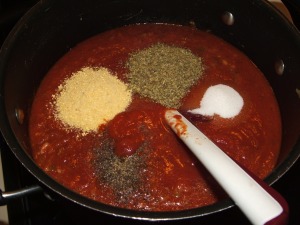
Add the sauce, tomatoes and spices.


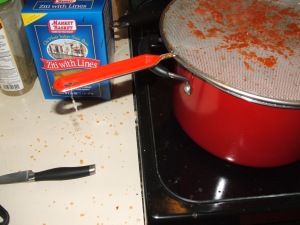
Simmer your sauce.. but dont leave it to be watched by the son while you go study for your exam or you will end up with a mess… which I made him clean up.. and told him to get off the phone while cooking!  LOL

Once the smell had permeated your home (and the 35-40 minutes are up) you can take your golden and delicious sausages out of the oven, leave the oven on since you will need it soon.

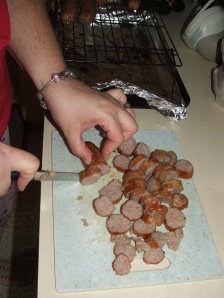
And slice them up once they have cooled slightly.

Stir the sausage into the sauce.

Boil salted water in a large stock pot and add your two boxes of Ziti.. or Bowties.. or Macaroni.. whatever floats your boat.

Drain pasta and mix with sauce.

Pour into the lightly greased pan.

Cover with your shredded cheese.  And bake for 40-45 minutes or until the cheese is melty and gooey!

Oh and my solution to the gelatinous and crispy issues…… dont cook your pasta fully.. a little less done than al dente.  AND a bit extra sauce around the edges.

This recipe took about 2 hours to make but that included the 40 minutes to cook the sausage and the 40-45 to bake the ziti.  It is filling and hearty and since you got rid of alot of the fat from the sausage it is only mildly artery clogging.  HAHA   All in all an easy dish to make and very tasty!   I cant wait to hear if Stephanie and her spouse liked it. 

Happy Sharing!!

Steak Chili

My family loves chili.  Spicy and smoky and rich tomatoey chili.  Rob and the kids dont like beans but I do so I always scoop out some and add some beans to mine.  I know that alot of chilis are made with ground beef, or chicken or whatever but my favorite way and my familys favorite is with steak.  One of the things that is great about this recipe is that you can take a relatively tough and inexpensive cut of beef and make it tender and good.  

Picking the meat is important.  Some people think you need to get a tender piece of meat to do something like this but you dont.   The secret is braising.  Braising is the method of browning the meat and then using moist heat to break down the tough collagen and fibers in the meat.  If done right you can take that tough piece of meat and make it into something soft and fork tender!  I will use what is on sale; stew beef, chuck steak, 7 bone steak, hell even a roast will work.  You do need to have some marbling in the meat.  This will help with your tenderness factor and give a nice richness without adding a ton of fat.  That is another advantage of using steak and not hamburger, there is less fat so it is better for you! 

Ingredients 
3 lbs of steak or a roast, cut into cubes cut slightly larger than bite size
3 cans of tomatoes with diced jalapenos
1 large onion
3-4 cloves of garlic chopped
2 jalapenos
1 small can tomato paste
3-4 tbsp chili powder (to taste.. this is medium for us)
1 1/2 tbsp cumin
1 tsp salt
1/3 tsp red pepper flakes
1 can of kidney or black beans drained (optional)

First cut up your beef.
Then ask your son to prepare the jalapeno, onion and garlic…… this is the mess he makes.
After said child cleans up his mess and brings the dregs out to the composter, you grind up the veggies with a mini processor.

and brown the meat in a large dutch oven. 
Add the veggies.
And saute for 2-3 minutes and then cover with 3-4 cups of water (or stock if you have it but it isnt necessary). 
This part is not exact.  It depends on the cut of meat.  Some need more fluid than others to get tender.  Bring to a rapid boil and let it go until the water is almost gone. Test a piece of meat.. is it as tender as you want?  If not add some more fluid and let it go again. I usually only add a cup of water at a time at this stage.

Add your  spices.  

And your tomatoes and paste.  If you are adding the beans you can do it now as well.

Simmer until the flavors combine and it is to the desired thickness.  This is when I scoop some out into a small sauce pan and add some beans for my own personal chili! 

Millie wants her own personal chili too……. 

We were so excited to eat it, I forgot to take a picture of it all prettied up.  This is my cup with some cheese on it.. lol 
It is fun to personalize, you can add a dollop of sour cream, some minced onion or just eat it plain.. whatever works for you.   From start to finish this recipe takes about 1 hour to make depending on the cut of meat.  So good and so filling! 

Happy Braising!

Spicy Chicken Sandwich

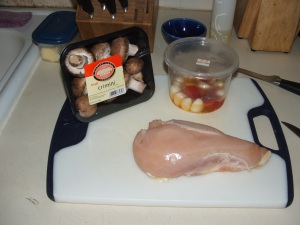
I love spicy.  I love garlic.  I love spicy garlic.  If you read my post about the parchment chicken packets you would know that.   On the olive bar at most grocery stores there is this great mix that is garlic and hot peppers in olive oil.

It is so spicy and garlicky goodness.  I will just pop the garlic in my mouth and savor the impending dragon breath!  It is so good with chicken I use the two together quite often.   Here is yet another take on it.   I had bought some mushrooms and while Aaron and I are the only ones who like mushrooms to eat,  Rob and Nik like the flavor they give. 

Ingredients

5-6 chicken breasts (about 2 1/2 lbs)
Smaller package of mushrooms ( or bigger, I just happened to have a small one)
7-8 cloves of the marinated garlic
1-2 pieces of hot pepper
salt and pepper
reserved hot oil

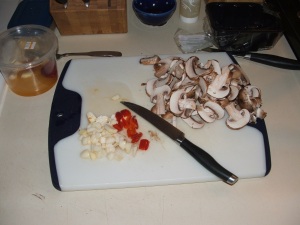
To start off, slice your mushrooms and chop up your garlic or slice.

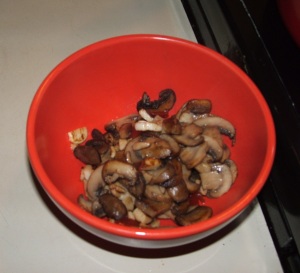
With some of your reserved oil saute your veggies until the mushrooms have wilted.


When cooking boneless chicken breasts, I always suggest pounding them so they are the same thickness all the way across and that all the breasts are of the same thickness so they all cook uniformly.  This is also a trick of the eye.  We as a society are always eating bigger portions than we need, by taking a piece of chicken and thinning it out, it makes it look bigger.  And it covers the roll better.  LOL

Remove the veggies.  And put a bit more oil in the pan.


Saute your chicken breast and get a good crust on one side and flip!


Put your veggies on top.  This way they wont get too crispy (unless you like them that way) and they will stay warm and infuse more flavor into the chicken.

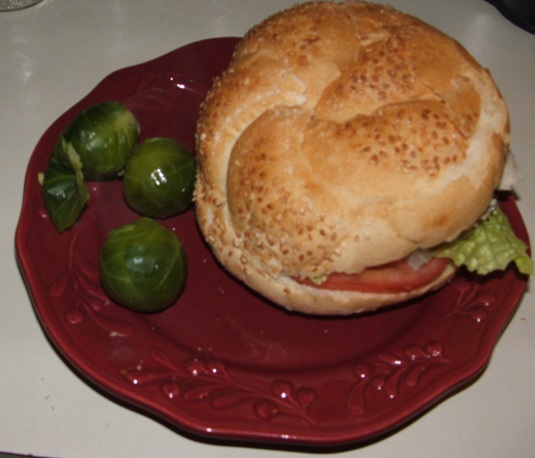
When done split a bulky roll, onion roll, hamburger bun or even a tortilla wrap and pile with lettuce, tomato and some of the warm veggies.  If you like you can add mayo or whatever but it didnt need it.   Then drop your chicken on it ( I had a huge roll and the littlest piece of chicken so mine looks funny.  The kids were almost done theirs before I got mine ready for picture or I would have shown the size difference by pounding).


This is very food group balanced; chicken for protein, roll for carbs, veggies for veggies and garlic for spicy; so all i added was some brussel sprouts!


I hope that you can have fun with this recipe as Idid.  And that you can find ways to make new and fun meals with a few ingredients.

Happy Cooking!!

Meaty Twice Baked Potatoes

About 3 years ago Rob and I went on this ridiculously radical diet.  I was eating just turkey burgers and salads.  I lost a ton of weight in a couple weeks but I was miserable.  No dairy, no beef, no sweets, no carbs.  I mean it was absolutely structured.  My life doesnt function with that much structure.   BUT we did get a few recipes out of it.  Anyone that knows us knows that we can find recipes or meal ideas anywhere.   We took this basic idea from the terrible diet, and made it better.  HAHA  We added some diary and alot of garlic.

Well recently I joined Weight Watchers and Rob will too once we get the okay from the oncologist.  I know that they worry about people on chemo losing weight but for Rob the chemo diet didnt work.  He has not lost anything and he is about 100 lbs over weight, as am I.  So this was a great move for me/us. 

Which brings me back to this recipe.  I made it the way I always have and decided to plug it into the Points Plus converter.  I didnt fudge on the ingredients and was pleasantly surprised to find out that it is only 9 points per serving.  Yeah for yummy and not too bad a value.

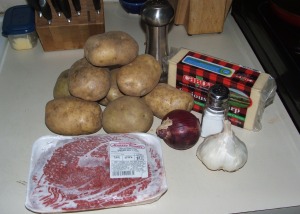
Ingredients8 large baking potatoes
1/2 lb lean ground beef/ turkey  ( I used 93% lean)
10 cloves of garlic
1/2 large red onion
1/4 cup half and half  ( or milk, i was out and used the half and half to finish it off)
2 tbsp butter
Salt and Pepper

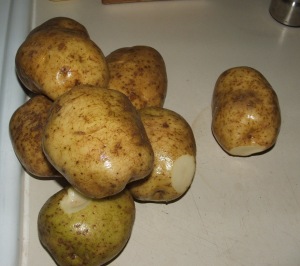
Thoroughly wash and clean up/remove blemishes of your potatoes.


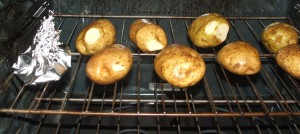
With a piece of aluminum foil, take your unpeeled garlic and a couple drops of water and make a pouch to roast your garlic in.   Throw that and the potatoes into the oven.   Please do not look at how dirty the oven is!!  It needs to be turned on to clean tonight.

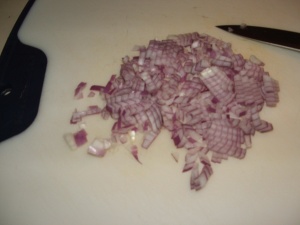
Chop your onion fine.  You want the flavors to meld.


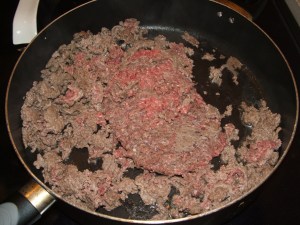
Brown your burger.  I used beef (and that is what i used in the WW recipe thingie) but this is soooo very good with turkeyburg too.


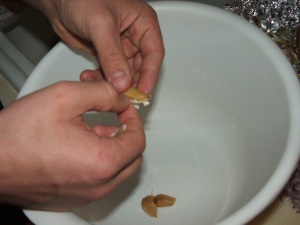
When the garlic is soft and the house smells great, take it out of the oven and put aside until the potatoses come out.  Then have your son take the garlic and start the messy job of removing the paper peels.

Put the garlic into a large bowl.

And add the onions to the browned and drained beef.  Stir until the onions have softened up.


Slice the potatoes in half  lengthwise and remove the meat of the potato and put it in the bowl with your garlic.  Put the potato skins on the baking sheet and put in the oven for about 10 minutes to crisp them up.


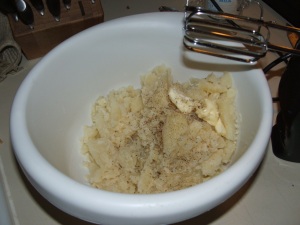
Add the half and half/milk and the butter along with some salt and pepper.  And mash!!!

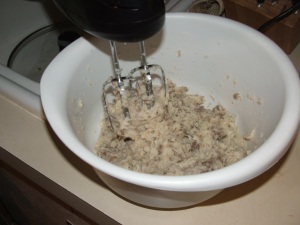
Add the browned meat and onion and mix again.


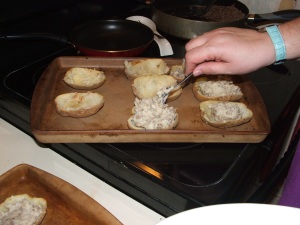
this isnt really pretty looking.  I can be honest, it looks kinda ucky.. but it is good.   Stuff each half with enough to fill it.  You dont want to go to far over the top or you are going to have to get rid of some of the skins. 

And Rob took this “perspective shot”  not sure what it is a perspective of but he likes to take pics and be involved so this one is for you honey!


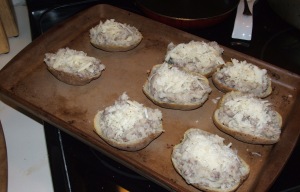
Top with cheese.


And bake for about 30 minutes..  but dont have the kids be the ones in charge of the timer.. or they will be a bit dark like this.  HAHA

I served this with some corn for the kids and a small salad for myself.   I mean a small salad!  I was too full.  I think in the future I might just start off with one.   Which is half a serving.   

As with all my recipes, they are open to playing around with.  YOu can change the flavor by adding spices, different cheeses and or trying different potatoes.  I have made these with Yukon Gold potatoes and they were very good.  The fun thing about cooking is the mixing it up!!

Happy Cooking!

Butternut Squash Stuffed Shells

This is one of my most asked for recipes, hands down.  When I have it for left overs I have to bring in extra for a couple people in my office who love them, right Emily!?!!  These are semi labor intensive but like my last post where I talked about freezing ahead, I make two (this recipe makes two 9×13 trays) and freeze one.  They freeze amazingly well.   The butternut squash I made is slightly sweet and smooth with that rich taste that only copious amounts of cheese can give you.

Let me warn you, this is not a low fat dish, there is really no way to make it low fat.  It is not gluten free or dairy free.  This is a good old fashion clog your arteries with goodness dish.  You will not need to have more than 3-4 shells (unless you are 17 year old boy who can devour about 10 of them in 30 seconds flat!) because they are so rich.  I most often serve with carrots or a green veggie. 

I originally got this recipe from a magazine 6-7 years ago but have doctored, played around and generally changed it so much I dont feel bad passing it off as my own.  I love to do that; do math on my recipes..  You know: add a little, subtract a little, multiply this or divide that.  Drives me boys nuts in someways.  “Mom what is the recipe?”  UMMMMMMM I dont know.. it started out *this* but now its *this*.  Its good for them.. keeps them on their toes and teaches them to try new things some times.

First a note about cheese.  I very seldom buy preshredded cheese for anything other than tacos (or for Rob and the kids to use).  When I am cooking I buy the one pound blocks of mozzarella, the 8 oz blocks of cheddar and I never buy canned or ready grated hard italians.  Part of what keeps those shreds from clumping is a de-clumping agent, sometimes natural products but it isnt cheese.  I am paying for cheese, I want cheese!  So take the time and grate it or shred it yourself.  It tastes better and is more cost effective.  Already shredded cheese is generally more expensive because of the convenience factor.. seriously a 1 lb block of cheese takes 2 minutes to shred.. and it is a dollar more in some stores.   You do the math!

Ingredients

2 boxes of  jumbo shells
2 jars of your favorite alfredo sauce (can do low fat, but I’ve yet found one I like)
1/2 cup milk
6-7 grates fresh nutmeg (can use 1/4 tsp ground but the fresh is so much better)
2 tsps ground sage
1 15 oz container of part skim ricotta
1 egg
10-12 grates of fresh nutmeg (or about 1/2 tsp ground)
2 1/2 cups of your squash (or store bought) with any extra fluid drained off
3/4 cup shredded cheddar cheese
1/2 cup grated fresh parmesan or other hard italian cheese (optional)
2-3 cups shredded mozzarella

First boil your noodles in salted water. (see note about salted water below***)  And drain well and put aside to cool slightly.


In a seperate bowl mix the alfredo sauce,  milk, nutmeg and sage.  Mix thoroughly and set aside.


Mix your filling together which consists of the ricotta, egg, squash, 1/4 cup of the shredded cheddar and 1/4 cup of the parmesan.  Mix together until smooth.
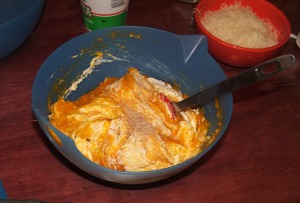
 

Now it is time to stuff!  This is a blast, the kids and I do this part.  They always over fill but after a few gentle reminders they get better.  Spread alittle of the sauce in the bottom of your greased 9 x13 pan.   I use one metal one for dinner and then another aluminum one to get in the freezer.   
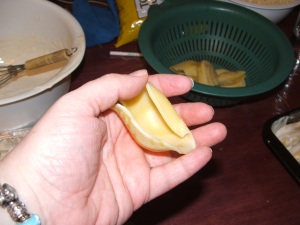

You want to fill them so that you can almost fully close them.   Then lay them with the opening facing the side.  Fill up and cover with half of your sauce (remember this makes two pans).  You should make sure that the sauce is on all the shells so you might have to pull it out of the crevices between the shells. 
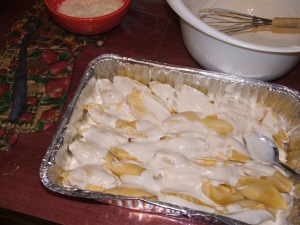
Take the remaining 1/2 cup cheddar, 1/4 cup parm and 2-3 cups mozzarella and cover the shells.

Bake at 350 for about an hour until bubbly or the drooling has gotten so bad you cant stand it.    It comes out all yummy with crunchy cheese around the edges!
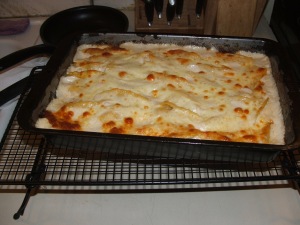
Serve with your favorite veggie and some nice crusty bread.   So tasty..
*** There is some controversy about salting your pasta water but i did a little experiment after something I saw on a cooking show.  I boiled pasta one night in salted water (1 tbsp kosher salt in 10 cups of water adding one pound pasta) and served it with just butter and pepper, no one person added salt.  The following week made it with no salt in the water and both of the kids added salt and it was much more salt than what the pasta had in it from the water.   Cool huh!!  Now if you are on a restricted salt diet please omit.

I love this recipe. It is fun to make, not too hard and other than a bit time consuming, so worth it.  Rob doesnt eat squash (neither will the boys but they will eat this) so when I make this I make two lasagnas or two stuffed italian shells as well. The kids eat both so there works out to be enough for dinner and a couple lunches for Rob and I.  Ihope you try it and love it as much as I do.

Happy Cooking!

Putting up Squash for Freezing

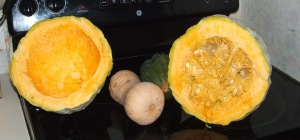
I love squash.  I am the only one in the house who loves it though.  😦  I keep telling Rob he doesnt know what he is missing but he just looks at me and gives me the look!  You all know the look.. the special one that husbands give when they are not finding you funny.  LOL   So anyway… my mom gave me a laundry basket of squash.. yes a while laundry basket..  There were three kinds, Hubbard (right), Acorn (center) and Butternut (left).

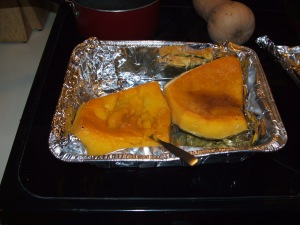
Split them all in half and seed them.. With Hubbard you need to split it, seed it and then break it into more manageable chunks, for this one I got 10 chunks!!  


Put in a foil lined pan at 350 degrees and put a 1 tsp of brown sugar on each one (feel free to omit the sugar but I like it slightly sweet).  Bake for however long it takes for it to get soft.. each one is different.  Ripeness and thickness effect baking time.

Scoop into a bowl and let cool a bit.   This is what i got with the first two batches.. I thought it would be big enough.

Once you have it all done and it has cooled a bit, whip it up to mix the flavors of the different squash and to get any large lumps out. 


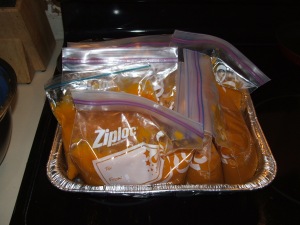
Then divide up into ziploc bags for freezing.  I freeze mine into 2 1/2 cup packets which I then use to make my something very special……. Butternut Squash Stuffed Shells.  That laundry basket of squash got me 12- 2 1/2 cup packets!!!  WOOOOOOOHOOOOOOOO.


I love putting things up for future use because you then always have a way to plan ahead.  It takes 2 hours to do this most of the time…. if you are doing this with just a couple squash, that is a lot of time for a little return.  Doing it this way you can get enough to last me the year and it only took me about 3 hours! 

Happy Cooking!!!

Snickerdoodles

So this year we had a cookie swap at work.  It was so much fun.  I love making things and sharing them with friends.  This one was great because so many had participate.  I was particularly excited to see listed Snickerdoodles!  I love them, my family loves them and most of all my mother loves them.  I had a recipe but it didnt wow me.  THis one did.   We always get the recipes and my friend Lilly is the one who made these.  YUMMO  I doubled the recipe and it made for slightly crispier cookie.  The taste is great but if you like them a bit chewier, dont double, make two batches. 

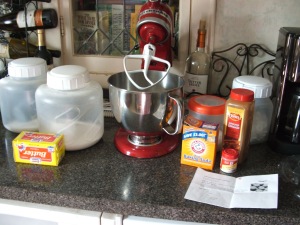
Ingredients
Yield about 4 1/2 dozen

1 cup butter, room temperature
1 1/2 cup sugar
2 large eggs
2 3/4 cups flour
2 tsp cream of tartar
1 tsp baking soda
1/4 tsp kosher salt
Cinnamon and sugar

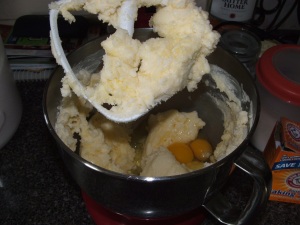
Preheat oven to 350.  Cream butter, sugar and eggs thoroughly in a large bowl.

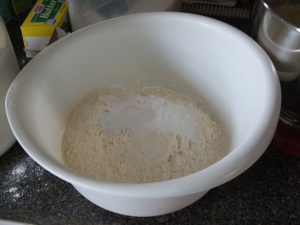
Combine the flour, cream of tartar, baking soda and salt in a seperate bowl.

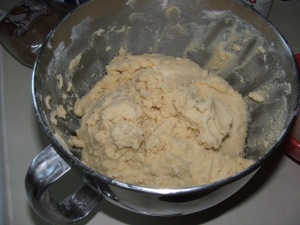
Blend dry ingredients into the butter mixture, making a stiff dough.. chill for 20 minutes.


Make a sugar mixture of equal parts sugar and cinnamon.  I always start off with a little cause you can make more.  Form into 1 inch balls and roll into your sugar mixure.


Place on your PC stoneware or a parchment lined cookie sheet.  Bake for 10-13minutes depending onyour stove and your desired softness.  


These will have to be hidden if you want them for an event, or made the day before cause they are addictive!   I had to hide them… cause they kept disappearing on me!  I wont say who but they were born in 1993!!  you do the math..

Happy  Baking!!!!

Nurse-y Hour Impending….

As any of my fellow nursing students can attest, the witching hour; or as I think of it the nurse-y hour; is upon me.  In less than 10 days I will be back in full swing of nursing school. I cant help but look at it like a large wall looming closer and closer.   On the other side of that wall is a better job, being a nurse.  BUT that wall is huge and since this is the last wall before I can go for my boards…. it is a giant scary wall with razor wire and guards patrolling the ramparts.  Yes I know that the guards are our teachers and they are also our guides but damn it is scary.

I have to say that I have enjoyed these last few weeks off, cooking, baking, blogging and reading… oh how I will miss reading.  Towards the end of a break I turn into a book mad woman.. taking it into the bathroom, reading at lunch, hell I would read in the car if I could.  Just to get that last bit of alternate reality in before I lose me again.   I read an article somewhere before I started, that nursing school is a giant journey of self discovery, where you both find yourself, and lose yourself. 

Lets think about that.. find yourself.  I can see that.  I am finding that I am good under pressure.  I am finding that I have a natural way that can usually calm people down.  I am also finding that things that gross people out doesnt usually do that to me.  These are all really cool findings.  BUT You also lose yourself.  While I am in school, I lose all my interests.  I dont get to cook that often.  I dont get to read ever other than text books.  I feel like I lose a bit of my connection with my family.  I know that we are there for each other but out of necessity, my focus isnt as fully on them as I wish it was.  I lose my self grooming time.. hell last semester I went 4 weeks without plucking my eyebrows.  I looked like a sasquatch when I took off my glasses.  LOL  But most of all I feel like I lose Kim.  Like I am only a nursing student, a wife and a mother.  Of all the roles I have, Kim is the one that is the most expendible because that lose doesnt affect other people or screw up school.

So tomorrow I will be making alot of yummies to put in the freezer and to take to Vermont for our DeVoid family Christmas.   I have more candy to make and things to do so I will stock up on pictures for future posts..  Dont forget me while I am off in nurse land. 

Happy living.

Oven Baked Spicy Fries

Since Robs third chemo treatment he has been craving fries, and chicken.  But right now it is fries.  And more fries.  And did i mention fries.  So last night we made the Parchment Chicken packets and these babies since they cook at the same temp.  So yum.  I love baked fries.  I dont do greasy very well anymore so these just tickle my fancy.   You can use whatever seasoning you want but these are so good.

Ingredients
3 lbs potatoes, washed and wedged, I used reds and left the skin on them
1 tbsp oil
1 tbsp Adobo
1 tsp fresh ground pepper

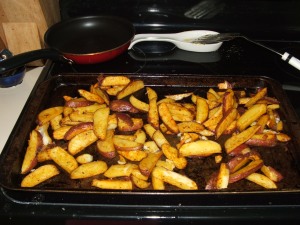
Preheat your oven to 425 and lightly spray or oil a cookie sheet.  Pat down the potatoes with a towel or papertowel to dry them a bit.   Mix the seasoning with the oil in a large bowl, add the potatoes and toss to coat.  Put on the cookie sheet and place in the oven.


Bake for about 40 minutes turning every 10 minutes or so.   When done, test for saltiness as adobo is a bit salty and add more if needed.  Serve immediately.


This is a great recipe for making the Parchment chicken with.  You get the potatoes in the oven and then get your chicken wrapped and ready in the parchment and when there is 20 minutes left on your fries, pop the chicken into the oven at the same time.   SOOOOOOO GOOD!!!!

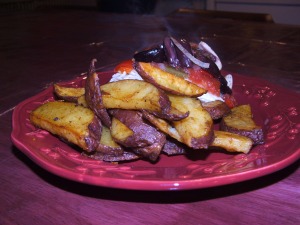
The fries are crispy on the outside and soft on the inside with a nice spice on the crust.  A perfect oven fry!! 

Happy Cooking!

Previous Older Entries