Zucchini Bread

When I first met Rob he pretty much ate things from a can or a box or from the freezer.   He liked some of the things his mom and Grandmother made but to hear him talk, it wasnt much.  He was a hugely picky eater and it was pulling teeth to get him to try anything new.  He always complained when I would make him try things.   The boys are the opposite.  I made them try new things all the time, from when they were little all the way up until last night.  HAHA.  They have such a wide palate it is scary.

Once Rob started really trying new things though.. a whole new world opened up for him.  He will eat so many new things.. one of his favorite desserts is this.  He was always weirded out by the fact it is sweet and has a vegetable in it.  I love it.  My mom used to make it when I was a kid.  I dont have her recipe but I did find this one and I love it. 

Ingredients
Yield: 2 loaves

3 cups flour
1 tsp salt
1 tsp baking soda
2 tbsp cinnamon
1 tsp nutmeg
1/4 tsp baking powder
3 eggs
2 cups sugar
1 1/2 tbsp vanilla
1 cup oil
3 1/2 cups grated zucchini with the fluid drained off

Cast of Characters

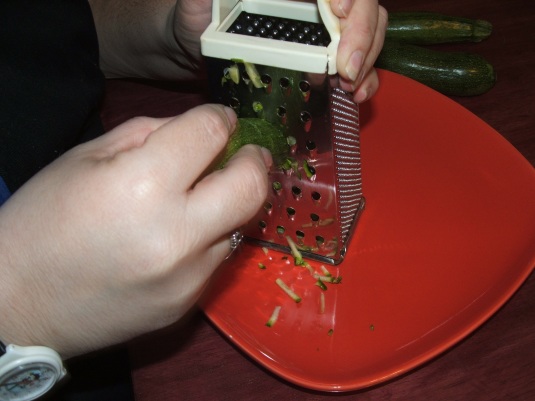
Start off by grating up the zucchini.
Measure your dry ingredients into a bowl and mix together.

Crack the eggs into a bowl.

Add the sugar and oil.
Mix together the egg, sugar and oil.
 
Spray the loaf pans.

Pour the egg mixture into the dry ingredients.

Then add the zucchini which you can squish all the excess water out of.

Mix all together.

Divide into the two pans.
Bake at 350 for one hour or until toothpick comes out clean.  Take out of the pan after 10 minutes.

So yummy, and the edges get slightly crunchy!  One of my favorite sweet breads..

Loaf of the Meat

OR as my husband wanted to name this.. Meatloaf Robbie Will Actually Eat!  HAHA  it took me three or four tries to get him to even try it.  But then he was hooked.   Now he asks for it 4-5 times a month.  I dont let him have it that often but that is how often he asks for it.. LOL  Keep them wanting more! 

I found the origins of this recipe in some magazine about 6-7 years ago.  For many years my meatloaf was kind of a big meatball in loaf shape.   So in true Kim form I took a recipe and kicked out what I didnt like and put in what I did.  It has been a very popular recipe among my friends and I am  happy to say is actually pretty low fat.  This recipe makes atleast a 9 x 13 pan (I tripled it and get four bread loaf pans) and it only works out to 5 points on WW for a pretty large serving.  

My mom always looks at me weird when I make this because it is different than the one I was raised on but the added veggies and odd spices make for a flavorful and healthy addition to my menu.  And Robbie will actually eat it.  Nik and Aaron dont eat it, they devour it!!  Sometimes 2-3 helpings.  My favorite way to serve is with my garlic mashed potatoes which i will be posting in a couple days, and with corn!  SOOOOOOO Yummy!

Ingredients
1 9 x 13 pan makes 9 servings  (the pictures are of a tripled recipe)  WW Points~5

1 1/2 lbs ground meat, I do half and half 93% beef and 93% turkey 
1/2 lb (3-4 links)  sweet sausage, optional but it adds depth 
1 1/2 cup bread tore up into small pieces (6-7 slices)
1 egg
1 medium sized onion
3/4 cup carrot** (these are not exact measurements, I just take some carrots)
3/4 cup broccoli ** (again, just enough broccoli to be about 3/4 cup)
1/4 tsp ground mustard
1/8 tsp sage
1/2 tsp ground thyme
1/2 tbsp salt
1/4 tsp black pepper
1/8 tsp nutmeg (or the equivalent fresh grated)
1 cup ketchup, divided
1 tbsp hot sauce or brown sugar (depends on if you want it hot or sweet)

** I have also used red and green pepper, celery is good too, hell even pea pods would be good, but carrot is always in it.  I cannot eat much celery and Rob doesnt like peppers.

Cast of Characters

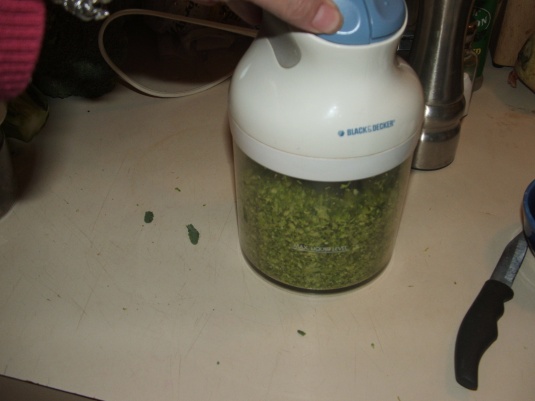
With a food processor (or this handy little food grinder thingie I got) grind up the veggies. 

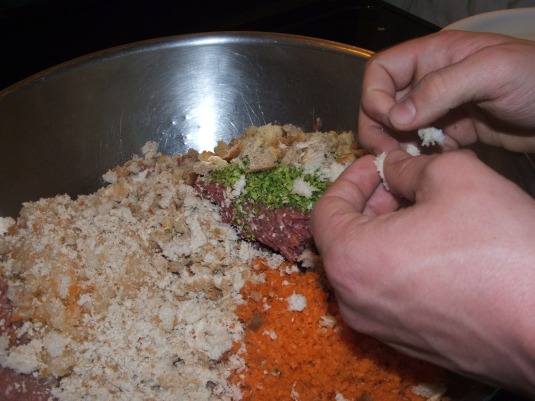
Put your meat and veggies in a large bowl and break up the bread into little bits.

Lightly beat the eggs and add to the bowl.

Mix the spices up and sprinkle evenly over the stuff in the bowl.

MMMMMMMMMM doesnt that look tasty!

Since I always use fresh nutmeg I always do this at the end so I can judge how much to put in.

Then add 1/2 cup of ketchup.

And mix.
Plop (and yes it does plop) it into the pans you are using.  You can use 9X13, loaf pans, even deep dish large muffin pans.

Bake at 350 total for about 45-60 minutes for loaf and 9×13, about 25-35 for muffins.  They will release alot of fluid from the veggies and the fat and that grosses me out to have my food sitting in that so once or twice I will drain off the yucky stuff into the meat container or a can or something so that I can discard it later.

When done cooking you take the other 1/2 cup of ketchup and the hot sauce/brown sugar (or both for a sweet hot mix), combine and put on top of the hot meatloaf and broil on high for 4-5 minutes until it is done to your likings!!

Here it is served with garlic mashed potatoes (which I will post in a couple days) and some of the leftover broccoli.  I didnt have any corn in the house.   😦

Meatloaf has always been one of my faves and while I do still love my moms, this is more healthy for you and tastes damn yummy.  I make large batches like this because it freezes so well.  Simply wrap in a double layer of aluminum foil. You take out the night before and put in the fridge.  About 45-50 minutes before serving put it in the oven still in the foil and bake at 350 for 30-40 minutes.  I do eliminate the glaze/broil part for ones I will be freezing and do that the evening I heat it up!   OR you can just cut off pieces and heat up individually in the microwave.  YUM!

Happy Cooking!!

Recipe Swap! Baked Campanelle with Spinach and Meatballs

This is the second in what I think will be quite a few of these recipe swaps.  On my What Cooking board we have a group of fellow foodies who love cooking and baking and wanted some new recipes! So one of the ladies coordinates these recipe swaps.  She collects the recipes from the participants and then randomly sends them out to their new chef.   This was the one I won!

I did the recipe pretty much as listed except I made my own meatballs, which is back in the blog a couple weeks/month (time is running together) and I used a different pasta.  Here is the original recipe by Jey.

My review….. I liked it, alot.  I will have to tweak it a bit to make it more WW friendly but I loved how creamy it was.  I LOVED the spinach and the basil I added.   The kids loved it.. and ate it up pretty quick!  For them it was like a meatball lasagna!  LOL   Mr Pickypants wasnts as impressed.  He isnt a huge fan of ricotta, so this didnt do much for him.   We will see how well he likes it once I tweak it a bit. 

Ingredients
I didnt put this in WW for point because I was scared too.. so this was a splurge meal for me.  It took about an hour to make including baking time.

1 onion chopped
4-9 cloves of garlic (the recipe called for 4 I used 9 because that is what Rob peeled)
1 14 can diced tomatoes
1 jar of pasta sauce
1 box of pasta cooked aldente.  I used campanelle, they look like trumpets!
1 16 oz bag of spinach
1/4 cup fresh basil
12 oz of ricotta
Pinch of nutmeg or grate fresh
S & P
1/4 cup shredded parmesan
4 oz of fresh mozzarella
25-30 Meatballs

Cast of Characters

Set up your pasta pot and fill w salted water.

Chop the onions

And the garlic

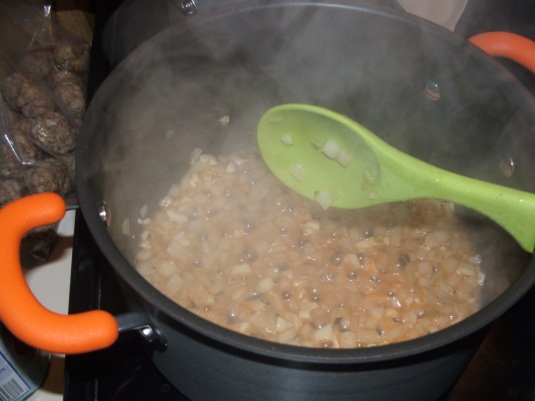
Add them to another dutch oven/ 8 quart pot.  No  need to add oil or anything.

Turn the pot onto medium high, and then drain the tomatoes.

Add the juice to the pot and use that to cook the onions and garlic.  No need to waste the flavor or to add any oil.

Next is to prep your spinach.  In a large bowl tear up the spinach. If using baby spinach then you really dont have to but if you are using regular I tear it up and take out the large center stalk.  I think they are bitter. 

Add the tomatoes once the onions are translucent.

And then the pasta sauce.

And then the meatballs.

Let simmer for 20 minutes while you finish the rest of the dish, stirring often.  I love the smell of sauce cooking.  The warm richness of the tomato and the onion and the spices!  I love alot of basil in my pasta which is why I added basil rather than parsley (like the original recipe used).  One of my favorite things to eat is a caprese salad.  Tomato, basil and fresh mozzarella drizzled with balsamic vinegar!  HEAVEN….  Oh and extra salt!    Okay back to this recipe….. haha   cut up your fresh basil into ribbons.

Add to the bowl with the spinach.  I like the barely cooked/slightly crisp aspect of the spinach and the sharp bite of the basil is a nice contrast to the creamy sweetness of the ricotta.


Grate the nutmeg into the bowl with the spinach/basil.

Then the salt and pepper.  You wont need too much salt since you salted the pasta water.

Check on the pasta frequently, you do not want it too cooked or else it will turn to mush in the oven. 

About this time your meatballs and sauce should be ready.. Just turn it off because you dont want it too thick.   MMMMMMMM I love the smell of sauce and meatballs cooking.  I just want to dig in and eat like 3-4 of these on a piece of garlic bread! 

Add the ricotta to the spinach reserving 3/4 a cup or so for the top, and combine.

Drain the pasta when it is al dente.

Then add quickly to the spinach.

Add the meatballs and most of the sauce leaving some in the bottom….

Then mix to incorporate. 

Dump back into the dutch oven..

Dot with the remaining ricotta, and the parmesan and fresh mozzarella.  Bake for 10-15 minutes  covered in a 350 oven.  Remove the cover and bake until the desired browning melting has occurred..

Then plate up with your favorite veggies.

This was a melty yummy fresh tasting wonderful mix of flavors.  I adore ricotta so this worked for me.  I would cut back to about 1/2 a container next time to make it more palatable for Rob but for the most part, this was a success with the recipe swap..

Happy Cooking and Swapping!

Stir Fry Chinese Cabbage

When I was in college I worked in a chinese restaurant as a waitress and delivery girl.  I had never had chinese food before college.  Okay well maybe never isnt the correct word, intensely infrequently would be a better way to put it, like 5-6 times when we would go into the city for school clothes shopping.  HAHA well anyway.  I learned alot about restaurants and chinese food that year.  I learned that most of what Americans call chinese food is not what the Chinese eat when the place is closed for the night.  Those late nights after closing the store, I was introduced to real chinese food. 

Duck tongue soup and chicken foot stew, were not really my favorites.  I would try them but I had a hard time getting past what they were.  So I ate alot of rice, simple soups and chinese cabbage or bok choy stir fried.  Fai, the owner, called me Honey and used to say to the cooks Gui and Jimmy, “Honey staying for dinner tonight, make extra bok choy, its her favorite”  and he always would.  I have never had bok choy or cabbage made as well as how Gui or Jimmy would make it.  This is pretty darn close. 

This is slightly adapted from this recipe on the website of a fellow Nestie Blogger.  I originally went to her site to find her scallion pancake recipe for Rob but I still havent made them yet.. but I saw this and had just bought some chinese cabbage randomly.. fate took a hand!   I am still not sure what had prompted me to buy the cabbage 3 days ago, especially since I didnt post for a recipe request for pancakes until yesterday….  (enter the Twilight Zone theme).

Ingredients
WW points 0 
1 head of bok choy or chinese cabbage
5 cloves of garlic (or to your taste)
S & P
1 tbsp soy sauce
2 tbsp corn starch

Cast of Characters

Start off by mincing your garlic.  I did a kind of haphazard mince so there were big pieces and little pieces to vary the flavor.

Throw it in a pot with a spray of oil.  Saute on low for about 5 minutes, you dont want it to burn but do release its fragrance.

Chop up your bok choy or your cabbage (the original recipe called for baby bok choy, not finding it anywhere, boo).

Once the garlic is fragrant, throw half the cabbage in and let that cook, stirring often, for about 2 minutes to start to wilt.

Then once that is started to wilt, add the rest and cook for another minute.

Add your salt, and pepper.  Go gentle on the salt since there is a ton in the soy sauce.

Then add the soy sauce. 

Cover and let cook for about 3-4 minutes stirring often.

Sprinkle the corn starch on (forgot to take a pic of that part) and stir to combine and thicken the fluid.  Once it is thick enough, plate it up, or in this case bowl it up and enjoy! 

I am so happy that I found this recipe.  It brought back some great memories.  I am finding more and more fun things as I get more and more into this blogging thing.  I hope that you all are enjoying it as well!

Happy Sauteeing!!

Spicy Balsamic and Feta Pasta Salad

So it is in the dead of winter here in NH.  Okay maybe not dead but it is cold and snowy and dreary out.  And I want pasta salad.  I want something that reminds me of summer and pasta salad does that.  Well so does potato salad but especially pasta salad.  I love them anyway I can have them, creamy mayo based, oil dressing based, I have even had a weird cheesey based one.  That one was weird and I am not too upset that I never learned the recipe.  LOL   But there is something to be said about the mix of veggies and pasta and something to bring it all together.  And I am totally on Robs side that there is just something fun about cold pasta.  Yum

So two days after my surgery Rob and I were sitting and chattin about pasta and about a conversation that had been on a cooking board I am part of.  We had talked about where people got their recipes from and if people actually just make things up anymore?  So I said to Rob, well I do.  I said (with a little Vicoden induced bravado) that I could make up a recipe for something right then.  And this was born.  I was thinking of the grocery list and I needed feta, we had been out for 3 whole days!  And I needed salad fixings like cucumber and scallions and ohhhhh I want some of my spicy garlic.  Ohhh goodness a caprese salad sounds delightful.. well actually what sounds yummy is the balsamic reduction…….  so this was born.  It was born from a grocery list, balsamic reduction and Vicoden. 

I had a wait a few days to make it since we didnt get to the store that day.  And dont let the Vicoden fool you!  This is good!!  Since WW kind of limits my pasta intake I was not able to partake as much as I would like but Aaron ate almost the entire bowl by himself.  He loved it.  Rob liked the flavor but I had cooked the pasta a bit much.  Nik is weird, he doesnt like pasta salad, with the exception of my italian dressing one.

Ingredients
yield is about 12  3/4 cup servings.   WW points plus is 5 per serving
1 lb whole wheat rotini
1 1/2 cups balsamic vinegar boiled down to 1/2 cup
2 tsp sugar or 2 packets splenda
1/2 an english cuke  (about 3/4 cup)
1/2 cup red onion
4-5 scallions
3/4 cup quartered grape tomatoes
Spicy garlic from the olive bar to taste, I used 6 cloves
2 tbsp spicy oil (this was good for us, if you want just a subtle taste go with 1)
S & P
1/2 tsp ground mustard
3/4 cup crumbled feta

Cast of characters


Start by getting your balsamic vinegar in a medium sauce pan and add the sugar/splenda.  Reduce until it is about 1/2 cup, no need to be exact just get close so you can get the intensity of the reduction.  This may take about 1/2 hour and it will need to cool so unless you do a cold water submersion once complete you will need to start this before hand.  Or you can be a dork like me and have some on hand.  I use it for dressing on salads.   Next get your pasta cooking.  Salted water is important! 

While this is going, peel and seed your cuke and dice into pieces.

Dice the scallions.

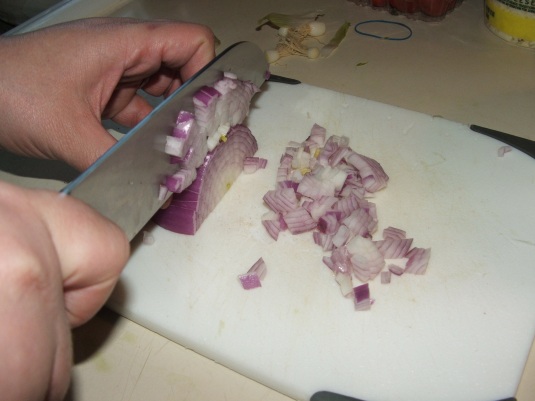
And the onion

Quarter and seed the tomatoes.  Rob didnt like tomatoes until last year.  He still doesnt like the “slimy bits” in the middle so I get those out of there too. 

Mince up your garlic, or slice it if you would like it a bit chunkier.

Throw all the veg into a bowl and set aside.

Next take the cooled down balsamic reduction and add the spicy oil and some S & P to taste.  Add the ground mustard and whipped them together until the oil and vinegar were combined.

Add the feta to the cooled off pasta.
And then the veggies.

And then the balsamic vinegrette!

And mix thoroughly.   Chill completely.  Serve in a chilled dish.

So very good. Balsamic reduction is slightly tart but with a sweet finish at the end.  The spicy from the oil is subtle and adds a depth.  The veggies are not swimming in dressing so they stay crisp.  The feta is a creamy contrast and I LOVE feta with balsamic anyway so this just works for me.    I hope it does for you too.  Comment if you have any ideas for serving options.

Happy Cooking!!

French Onion Soup

Many of my friends are Nesties.  For those of you who are scracthing your heads asking what a Nestie is, let me enlighten you.  The Nest is an offshoot of The Knot, a webcommunity where many women will go to plan their wedding.  They are tying The Knot…. get it.  It was a great site where I met some of my dearest friends.  The Nest is where you go once you are married, you know building The Nest.   Clever play on words there I know.  There I met Katie, Jodi, Beth, Britni, Jess and a slew of wonderful ladies.  They have brought many things in to my life.  One of those things is this soup.

This was posted last year on a board I frequent by Sue, a fellow NH Nestie.  I had only had french onion soup once before.  I loved it.  It was rich and silky and covered with cheese and crusty bread, seriously what was not to like.  I like this recipe so much i dont even need the cheese or bread on it.  In fact I didnt even have any in the house the last time I made this. 

Ingredients 
adapted from Sue-NH Nestie

3-4 large onions
1 tbsp butter
1/4 cup sugar
2 tbsp flour
4 cans beef broth or 8 cups homemade (I have made this with beef, chicken and veggie broth, all work)
2 tsp worchestershire sauce

Cast of Characters


First slice your onions, thick or thin, it depends on how big you want them.  I like medium, so that is how i do mine. 
 
Break them up a bit so they cook even.

Cook in the butter until slightly translucent.

Throw in your sugar.

Stir until incorporated and then add flour.

Cook for 3-4 minutes, it will get thick and look kind of gummy, dont worry it will cook out.  You need to let it cook for that long so that the flour cooks fully and will thicken it slightly.

Then add your stock or broth and worchestershire sauce. 

Let simmer for about 30 minutes, give it a taste.  It might need some salt or a bit of pepper per your tastes.  Serve either as is..

Or like this..  which I just made for the boys.. right now.. to be able to take this picture.. the wine is for me.. i am studying.. haha

For the cheesy way above, you can take croutons (easy but can change the flavor of your soup) or a dense bread that you toasted and lay it on the top of your soup.. lay the cheese over it and broil until the cheese is melty and browned.

Either way it is yummy..  though when I make the cheesy one for me.. I prefer swiss but the kids like colby mix.    This is a great thing to take to potlucks and I took it to the oncology department a couple times while Rob was getting chemo.  It was a hit.  It is a great to use crock pot to keep it hot and you can just bring some cheese and croutons for ease.   Thanks Sue for a great recipe.

Happy Cooking!!

Orzo Risotto with Spinach

I am on Weight Watchers (WW).   I joined 4 weeks ago and am doing pretty darn good.  I am happy with it.  I had a gastric bypass a few years ago and lost over 130 lbs, which wasnt as much as I wanted to lose but nothing to sneeze at.  I have a heart condition that manifested from losing the weight and it really slowed down my progress.  Add on getting married to someone who is a burgeoning foodie, having twin teenage boys and my own love of cooking and you have a recipe for weight gain.  Hence WW.    I wanted to make my own food and my own choices.  So here is one of the recipes I have added and tweaked and made my own. 

It started out in a Rachel Ray Mag.  Dont hate.  I think she is fun and bubbly and while entirely way over exposed, I like her style and her outlook on food.  If that changes the way you think of me, well I hope we can still be blog acquaintances!   This was in her March edition.  Well what this recipe started out as, is in the March edition.   Now is has been Kimmi and WW-ized!

One of the issues with rice (and some pasta) is that in WW it is so high in points.  I love rice; white rice, brown rice, basmati rice, jasmine rice.. hell if there is rice in the name I like it.  Even rice wine vinegar. Granted that has wine in there too which gives it a leg up!   So when I saw this I thought.. mmmmmmmmmm orzo…. rice…. orzo is 5 points per cup… arborio is 18 points per cup.  Wooooohoooooo  I was so excited.  Then I looked at the rest of the recipe.  There was no way that I was going to be able to make this points manageable unless I worked with it.  Plus Rob wouldnt eat some of the stuff in it.  So we were off to tweaksville.   And it worked.

Ingredients
Yield: 8 1/2 cup servings

4 cups cooked orzo (I just made 3/4 a box, the left overs are for salads)
1 small onion
S&P
1  1/2 cup half and half
1 cup pecerino/asiago/parmesan (italian hard cheese) fresh shredded
2 cups spinach with the spine removed (or use baby)
reserved pasta water (save some out when draining the pasta)

The Cast of Characters

Dice and lightly saute your onion with some S&P in a lightly sprayed pan.

Meanwhile shred your cheese.  The recipe originally called for shaker cheese.  I dont use the stuff.  It tastes like powder to me.  If you use it and love it, great, give it a try but it just isnt for me.  So I shred my cheese fresh, it tastes better and in the end it really isnt all that much more expensive if you watch the sales.

Take the spine out of your spinach.. you know, that part of the stalk that is a bit tough and not as yummy.. and then break it up into smaller pieces.  Or you could just use baby spinach, which would be easier, if I had that in the fridge that is.  So full grown tough spined spinach we used..  its still yummy.

The next couple steps I didnt take a picture of.. I hope you can forgive me.. Please?  

Okay, thanks for forgiving me.. I knew you would, eventually.   Oh the directions.. okay.

Add the half and half to the onions and stir together. Add the shredded pecerino and bring to a simmer until thickened up a bit.  Then add your orzo.  Stirring to incorporate.  Add some of your reserved pasta water to make it a bit creamier and thicken up to your desired creaminess/thickness.   

Toss in the spinach and stir to incorporate (yeah pictures are back)


Serve with whatever your little heart desires.  I served this with some edamame and some sliced cooked chicken. 

In the end, I just sort of mixed it all together.   Very creamy, not too cheesy and other than adding a touch more S&P next time, oh so worth the 6 points for the 1/2 cup serving!

Happy Cooking!!

Summer Curry Chicken w Basmati

Trader Joes is one of my favorite stores.  I am not sure if they have one around where you live and if they dont I am sure you have something similar, but if not I am truly sorry.  It is what my dad would call a hippy store.  My dad is a full blown redneck and to him any place that specializes in all natural or organic or free range, etc is a hippy store.  Personally I love hippy stores.  The produce is better and usually local, the herbs are fresher and they have so many fun and interesting things to try. 

This week at work a friend of mine Lilly had a dish that had been made by another coworker Pauline and I wanted to try it.  So I didnt get to the asian market but thought.. ohhh Trader Joes will have what I need.  Well not exactly so I thought I would make my own recipe. 

The main ingredient besides the chicken is a Summer Curry Sauce from Trader Joes.  If you dont have one around the sauce is made from tomato, garlic, red curry and some spices.   It was a puree and was smooth so I think that if you find something similar it would definitely work!

I liked it, it didnt have the intense curry I was looking for but this was still very good and I will make it again, just need to get some curry paste.  Rob and the kids werent as impressed as I was but liked it enough that with a tweak of extra curry it will be perfect.  I wanted to post this since way since not everyone likes curry as much as I do.  HAHA 

Ingredients 
Yield 8 servings   adapted from Pauline
2 lbs of chicken breast, boneless
1 onion (which was an impromptu addition so it isnt in the Cast picture)
1 jar of TJs Summer Curry Sauce (or similar type sauce)
1 1/2 cup of light coconut milk
2-3 cups of snow peas
salt and pepper
Prepared Basmati Rice

Cast of Characters

Cut up your chicken into cubes and season it with the S&P

Get your rice going while you are prepping the meat and veggies.

While the rice is cooking have the children help you with prepping.  They kind of tag teamed while doing other things so here they are…   This is Aaron!

Niks hands…
Really Mom I dont need my pic in your blog.. but I will smile just in case you use it. 

Dice up your onion.

Saute in your pan lightly sprayed with oil.

Once the onion is done to your liking (we like them a bit crispy still so we barely cook them since they will cook more with the chicken), add the chicken.

Cook until chicken is about 3/4 done****

Add the snow peas and cook for 1 minute.

Add Summer Curry Sauce and stir to  mix together.

Once incorporated, add in the coconut milk.
Stir together and serve over rice. 

****  A side note about cooking chicken.  I have found that I cannot eat dry meat.  If it is dry I simply cant eat it.  I had a gastric bypass a few years ago and it makes me sick, not sure why but it gets stuck and I am done eating.  So I am pretty good with making sure meat is juicy, if I want to eat it that is.  HAHA  So I have found that if I am making chicken with a sauce I only cook it about 3/4 of the way through and it finishes cooking when the sauce is cooking/heating up. 

I was actually pretty surprised by Robs reaction to this.  He said he didnt like curry and he doesnt like coconut but he was having a crappy day so didnt care, if he didnt like it he would have a PBJ sandwich.  He liked it.  Isnt it wonderful when someones palate opens up!

Happy Cooking!!

Redneck Caviar

This was recently a post on the Nest’s Whats Cooking site.  I was surprised to say the least.  I had gotten my black bean and corn salad recipe years ago from Allrecipes and had tweaked it alot, but had never seen it anywhere else.  Now here were recipes that gave me so many ideas for many more tweakings.  Haha  I think most other recipes added other types of beans and veggies to the recipe so that isnt something I can thank one specific person for.  But I would like to thank a couple of the ladies of WC for their recipes that helped me tweak to this final product.. first of all Melissa Bakes for her addition of tomato which was unique to the others I looked at.  And secondly Vintage Victuals for her addition of hot sauce.  YUM.  The rest is from an original recipe I found on Allrecipes  8 years ago and I dont think I even bookmarked it since it needed alot of tweaking. 

Now let me say, this is a total bean and veggie fest.  It is not terrible points wise on Weight Watchers either.  A 3/4 cup serving as a side dish is 3 points and it is high in protein!   It is rich and flavorful and goes well with chicken.  I have been using the last week in place of dressing and only using a 1/4 cup which has the same points as dressing but adds protein and flavor. 

Rob and the kids dont like beans.  Well Nik did until Rob moved in and now he doesnt like beans.  KIDS!!  LOL  Rob doesnt like mushy texture and I have yet to find a bean he will try.   So i eat alot of this when I make it.   It is so good on crackers or tortilla chips.  I served some last Sunday to Robs gaming buddies and they loved it.

Ingredients
yield about 9 cups  adapted from: see above

1 can black eyed peas
1 can black beans
1 can kidney beans
1 can corn
1 Roma Tomato, seeded and diced
1 medium onion (I use red or vidalia)
1 green pepper (if I had red pepper I would have used that too in addition)
Dressing
1 large fresh jalapeno
4-5 cloves fresh garlic
2 tsp kosher salt
1 tsp cayenne or chili pepper
1/2 tsp black pepper
2 tsp cumin
1/4 tsp dry basil
2 packets splenda (or you could use 2 tsp sugar)
1/4 cup balsamic vinegar
1/2 lemon (or you can use the whole one but this one was uber juicy!)
1 tbsp olive oil
2-3 shakes of hot sauce
1 tbsp water

The Cast of Characters

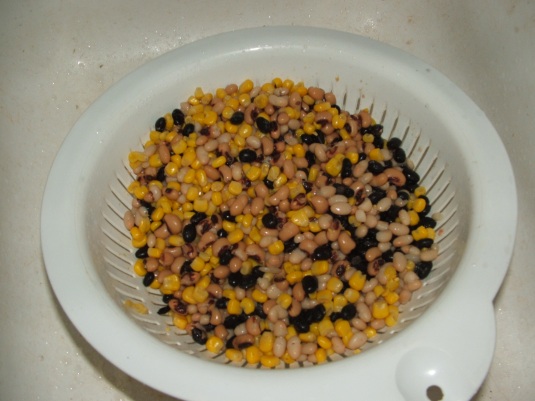
Drain the corn and beans.  Dont rinse but do put the beans in first and then dump the corn on top!  The water in the corn will rinse it a bit.  I might try two cans of corn next time.. but I am a farmers daughter and used to sell corn.. so I do love me some corn.

Finely mince the jalapeno and the fresh garlic.  And YES you do need to use fresh and not that ready chopped stuff.  You are looking for flavor here not ease!

Set aside in a bowl that is atleast 3-4 cup capacity.

 Dice up your peppers and onions.

Toss in a bowl with the beans and corn.

Seed the tomato.  I like tomato but I dont care for the sloppy middle and the seeds.  This eliminates that mess. 

Then dice them up!

Now make the dressing.  Add the balsamic, oil, hot sauce and the water.

Squeeze your lemon into the bowl.  If you have a juicer thingie use it but I dont so my hand is a juicer!

Add seasonings and such.  Taste to make sure it has enough salt and sweetness.  It is supposed to be a bit tangy but still have a touch of the sweetness.

Pour over the beans and veggies.  And mix….

Serve as a side dish,  or with tortilla chips, or any way.   Its yummy!

Happy Cooking!

Steak Chili

My family loves chili.  Spicy and smoky and rich tomatoey chili.  Rob and the kids dont like beans but I do so I always scoop out some and add some beans to mine.  I know that alot of chilis are made with ground beef, or chicken or whatever but my favorite way and my familys favorite is with steak.  One of the things that is great about this recipe is that you can take a relatively tough and inexpensive cut of beef and make it tender and good.  

Picking the meat is important.  Some people think you need to get a tender piece of meat to do something like this but you dont.   The secret is braising.  Braising is the method of browning the meat and then using moist heat to break down the tough collagen and fibers in the meat.  If done right you can take that tough piece of meat and make it into something soft and fork tender!  I will use what is on sale; stew beef, chuck steak, 7 bone steak, hell even a roast will work.  You do need to have some marbling in the meat.  This will help with your tenderness factor and give a nice richness without adding a ton of fat.  That is another advantage of using steak and not hamburger, there is less fat so it is better for you! 

Ingredients 
3 lbs of steak or a roast, cut into cubes cut slightly larger than bite size
3 cans of tomatoes with diced jalapenos
1 large onion
3-4 cloves of garlic chopped
2 jalapenos
1 small can tomato paste
3-4 tbsp chili powder (to taste.. this is medium for us)
1 1/2 tbsp cumin
1 tsp salt
1/3 tsp red pepper flakes
1 can of kidney or black beans drained (optional)

First cut up your beef.
Then ask your son to prepare the jalapeno, onion and garlic…… this is the mess he makes.
After said child cleans up his mess and brings the dregs out to the composter, you grind up the veggies with a mini processor.

and brown the meat in a large dutch oven. 
Add the veggies.
And saute for 2-3 minutes and then cover with 3-4 cups of water (or stock if you have it but it isnt necessary). 
This part is not exact.  It depends on the cut of meat.  Some need more fluid than others to get tender.  Bring to a rapid boil and let it go until the water is almost gone. Test a piece of meat.. is it as tender as you want?  If not add some more fluid and let it go again. I usually only add a cup of water at a time at this stage.

Add your  spices.  

And your tomatoes and paste.  If you are adding the beans you can do it now as well.

Simmer until the flavors combine and it is to the desired thickness.  This is when I scoop some out into a small sauce pan and add some beans for my own personal chili! 

Millie wants her own personal chili too……. 

We were so excited to eat it, I forgot to take a picture of it all prettied up.  This is my cup with some cheese on it.. lol 
It is fun to personalize, you can add a dollop of sour cream, some minced onion or just eat it plain.. whatever works for you.   From start to finish this recipe takes about 1 hour to make depending on the cut of meat.  So good and so filling! 

Happy Braising!

Previous Older Entries