Brined Chickens (or Turkey)

Sorry people, no pictures on this one.  It is a recipe but also just a process about cooking poultry.

A few years ago I was watching one of my favorite shows, Good Eats.  Alton Brown is a great entertainer; funny, informative, and well, entertaining.  I love how he mixes science and cooking.  I get all giddy when he has a little demonstration of how flour and fat particles makes the best roux and thickener.  I especially like how he can make it all come together..  ah I am gushing.  Must be the Novocaine.  I had my wisdom teeth out today.  My mind is a muddle so I really can’t do homework right now.  Too much discomfort!  So what a great time to talk about roasting poultry.  Which is where I was heading with my talk of Alton Brown.  HA!

Soooo anyways he was showing how to brine and roast a turkey.  I thought.. ummmmmmmmmmmm soaking it in water, salt and sugar… odd.  So I tried it!  Had every turkey in the last 3 years brined.  Love it! Love it! Love it!  But I had never brined a chicken until this weekend.  May have to do it from now on.  Brining doesn’t just add juiciness, it adds flavor.  We have a brine we use but there is so much you can do with a brine to change it up.  Below is our current recipe that we use for turkey and used this weekend for the chicken(s, we made three to have left overs for chicken and dumplins).  There are hundreds of brining recipes out there but we have worked on this one for a couple of years and really like it.

One other thing we like about this is that we didn’t have to buy any special expensive equipment.  We just used a Home Depot bucket with a lid that we have dubbed the bringing bucket.   we brine the turkeys in it and it is the perfect size for a 15-18 lb bird or three 8 lb chickens!  Just clean it out well after use and let air dry.  Then it goes down into the basement until the next use.  If we had another fridge we would use it for corned beef too but since that has to brine for over a week and it would be too hard to keep that temperature controlled this bucket seems to be only for poultry.  HA

Ingredients
Water about 2 gallons (not an exact science here people)
1 1/2 cup kosher, canning or sea salt (I guess you could use iodized but I have never done so and canning salt isnt that expensive and what I use)
1 cup brown sugar
2 oranges
1 lemon
Bunch of fresh rosemary
Bunch of fresh thyme
Bunch of fresh sage
2 Tbsp Peppercorns
1 large onion cut into eights
1 bulb of garlic

To start off I take 3-4 cups of hot water and put it into a sauce pan and add the sugar and salt. Bring it to a heat to dissolve the salt and sugar.  Turn it off.  Take my pestle and coarse crack the peppercorns just to break them up a bit.  Again not an exact science, just a coarse crack.  Throw that in the hot brine.  Thick slice the oranges and lemons (we have use limes too which is good) and throw them into the hot water.  This helps to release the essential oils.

Pour all this into your Homer Bucket or what ever you determine to use. Add about 2-3 cups of ice cubes to bring it back to a cold temp.  I then kind of eyeball it and add enough water to bring it up to about 2 gallons of liquid.  I cut the bulb of garlic in half, the whole thing, just cut it across the thickest part horizontally and put the bottom half (the part that is going to stay together due to the root) into the cavity of the bird(s you may have to break it up a bit if doing more than one bird) and break up the top part and throw the half cloves into the brine.  Put half of the onion chunks into the cavity of the bird and break up the rest.

Now this is essential to using fresh herbs in brines or marinades.  You have to bruise or crush the leaves on fresh herbs to get them to release the flavor.  So I take half of my fresh herbs and make them a bundle and just bend, break and generally bruise them but rubbing them in my hands.  Stuff them into the cavity with the onion and garlic. Then I do the same with the rest and throw them into the brine bucket.

Now comes the hard part, put the bird in, breast side down.  Cover with a plate to keep bird submerged and add 2-3 cups of ice cubes. Place cover on top and put in a cool room (or if you have a fridge you can put it in the fridge).  Hard huh!  Now walk away.  Dont touch unless you are adding more ice to keep it cool.  Seriously.  No need to fiddle with it.  Just leave it for atleast 5-6 hours for a chicken or 8-12 for a turkey.  I usually do it for 24 hours for a turkey but as long as you give it the minimum you will see the difference.

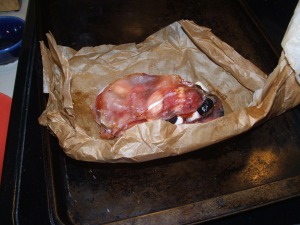
Okay, now to cook!!  Take our bird out of the brine and rinse with cold water.  Put in the roaster you are going to use.  Set your oven to 425 degrees.  Trust me.. 425.   We don’t stuff our turkey cause we leave the things in the cavity (onion, garlic and herbs. Also sometimes stuff some of the citrus in as well) but if you wanted to stuff it there are safety precautions to use about making sure the stuffing is up to temperature.  I usually truss the bird up a bit so the wings don’t burn but you dont have to.  Put the roaster uncovered into the oven and set your timer for 20 minutes.  When the timer goes off turn the oven down to 350.  Then roast like you normally would.  I usually put a meat thermometer in the thickest part of the breast about 1 hour into cooking and keep an eye out for correct temperature that way but use whatever technique works for you usually.

Once the bird is done, take it out and cover loosely to let the meat rest for 10 minutes. Then let the family attack the yummy skin.  It is usually a fight between Rob and Aaron, but if Mom is here, it is a free for all!  Then carve it up!  Makes amazing sandwiches the next day, or even better used for chicken/turkey and dumplins the next day.  Take all the meat off and make a stock with the bones. But that is another post……

Happy Roasting!!

French Onion Chicken Casserole

Last week on the Nest cooking board; Whats Cooking, there was a post for a a recipe swap.. for chicken.  Just ask Aarons girlfriend Corrie, we eat alot of chicken in this house.  The poor girl came over last summer alot and 8 meals in a row, had chicken.  So a chance to spice up and try a new chicken recipe was right up my alley.  So I sent my recipe for Parchment Chicken and hoped that the person had access to an olive bar.

I was so excited when I saw the highlighted email sitting in my inbox all shiny and darker than the others.  It was something new and I get so happy with new recipes to try!!!  Before I met Rob, this was a bit easier because Nik and Aaron will eat anything.  And I am not exaggerating.  Really I am not.  Once I dropped a batch of Butternut shells on the floor while taking it out of the oven, they scooped it up and ate it.  I was so upset I had ruined dinner, I let them.  Mother Of The Year here let me tell you!   Nik had mopped the floor that day, that is my reasoning and I am sticking to it!

But then there is Rob.  He is learning to try new things and that is wicked exciting but damn he can be picky.  I was worried when I saw what the recipe was.  It has alot of onions in it.  I mean alot and the bacon wouldnt be uber crispy after being in a gravy.  So it was with some concern I read the recipe.  Then I put on my bright and perky cheerleader voice and with the real excitement I was feeling for the recipe, I read the ingredients off to Rob.   I waited with bated breath as he mused it over!  I could see the battle of the old Rob who ate like 5 things, with the new Rob who has tried more things in the last year than he probably had in the 15 prior.  I am surprised he didnt look at me funny when I let out my breath explosively as he said.. “Sounds good!”

So here is my slightly changed version of French Onion Chicken Casserole.  Thanks Kylee, fellow Nestie, USA Kiwi!!  I loved it.  The kid loved it (Aaron was out tonight) and Rob picked out the bacon, and gave it to me, which made me like it better.  Then said the chicken was too juicy (there is no such thing) and ate the rest. LOL  I had to double the recipe since it was to feed 5 people so the original is slightly different.

Ingredients
recipe by: USA Kiwi, aka Kylee!  
Made 10 servings  5 oz of meat and 1/3 cup gravy     WW points  6
3 1/2 lbs of chicken breast, trimmed
1/4 cup flour
2 packets of onion soup mix
3 slices of bacon (the original this would be 6 slices but that is huge points wise with WW!)
1 large onion
2 1/2 cups water
S & P
(the original called for adding sour cream which Rob cant have, or plain yogurt, as you can see I was going to add greek, but forgot, next time will add the 4 tbsp of greek yogurt, I promise)

Cast of Characters

Trim the chicken and cut into 5-6 oz servings (about 10 sections).  Pound the thicker portions with a meat tenderizer to make them all the same thickness.
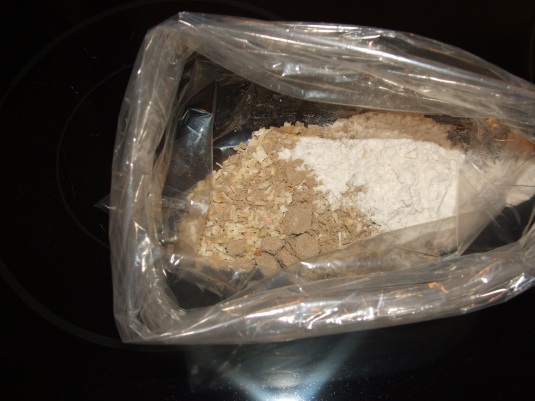
Put the flour and the soup packets in a shaker bag.

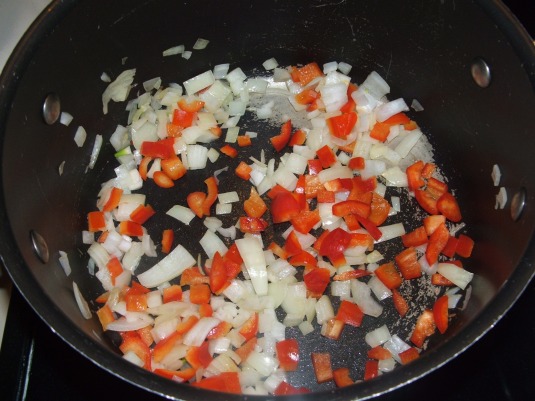
Chop up your onion.

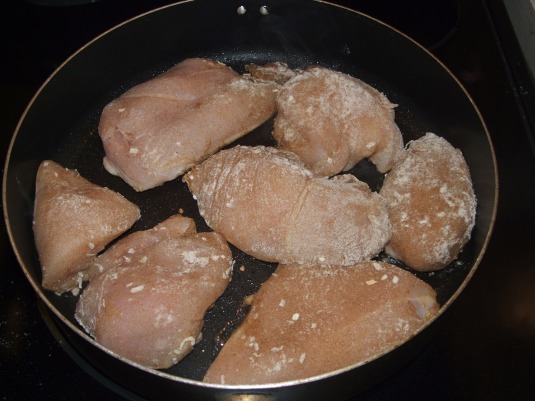
Spray the heck out of a large 12 inch frying pan, heat it to medium high and shake the chicken one piece at a time, placing in the frying pan as you go.  Save the remaining flour and soup mix.

Try to not have them touch too much. 

“Fry” on each side until browned, about 3 minutes.
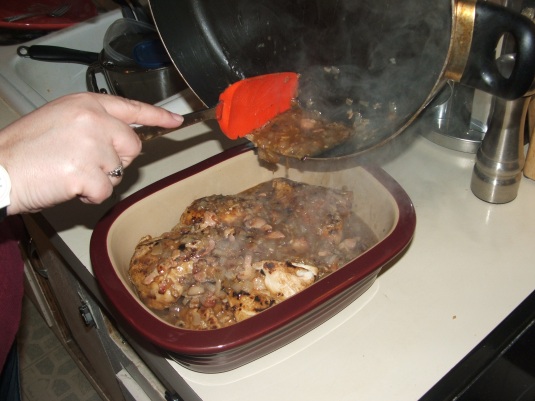
Lay in a casserole dish, in a single layer if possible, which unfortunately it was not for me.  LOL  Too many mouths to feed. 

Turn the frying pan down from medium high to medium and cut up the bacon into pieces with kitchen shears.

And add the onion…

And saute until the onion and bacon are both done.  The onion should be tender and the bacon should be slightly crispy.

Take the remaining flour and soup mix and add it to the water.

Pour over the onions and bacon and stir to incorporate.  Will thicken into a sauce. 

Add salt and pepper.

Pour over the chicken, cover and bake for 35-50 minutes or until the gravy is bubbly.  (If you remember the greek yogurt, you would take the chicken out and add to the gravy, and then put the chicken back in, but it is yummy without).

Plate up with noodles, rice, or potatoes.  Add your veggies and serve. 

I have to say, I liked it.   Nik loved it!! He ate two pieces in about 3 minutes.  Rob kept picking on the wobbly bacon and the amount of onions but he ate it.  Normally if something isnt palatable to him, he will push it aside and have PB&J.  He ate it, and said it was good but a bit too juicy for him!   I will be making this again.  I think I might add a couple spices but I have not decided which yet!  I am very happy I got this recipe and look forward to trying more recipe swaps!! 

Happy Cooking!!

Three Meat Jambalaya

This is totally a spicy food house.  I mean we all like it.  The kids drink hot sauce practically.  Okay well not drink it but it is eaten at almost every dinner.  They even put it on their eggs.  Rob and I like it as well but we are not as freaky as they are.  I like some flavor behind the heat.  The boys just like to brag how hot they can handle.  Typical teenage testosterone. 

My favorite way to have some heat is as part of a wonderfully flavorful dish.  I love my homemade salsa and hot pepper jams but if given the choice would much rather have a deeply flavorful stew-like concoction of this jambalaya.  I have a few friends with yummy recipes but I found this one a few years ago and had forgotten about it tucked away in “The Box”.  The Box is something I have talked about before and if I wasnt so comfortable sitting here leaned back in my chair I would go take a picture of said box.  For those of you new to my blog, The Box is where all my tried and true recipes go.  This is where I hold the recipes I want to pass down.  This Jambalaya is in The Box.  But it was buried, and now it is found. 

It started out as so many recipes do.. something else completely, then I tweaked the hell out of it.  The original  had only 1/2 tsp of cayenne!  Are you kidding me?  This makes 10 cups.  That ratio was way wrong.   The original was only one meat and had only onions.  It was bland and pretty much tomatoes.  This is better.

Ingredients
yield: 7 – 1 1/2 cup servings  (WW 7 points)  adapted: from AllRecipes

1 onion
1 red or green pepper
5-6 cloves garlic
1 lb of turkey kielbasa
1 1/2 lb of boneless skinless chicken breast
1/2 pound of shrimp
1 tbsp sugar
1 1/2 tbsp cayenne pepper (start with 1 tbsp and work up is my suggestion, we like this level)
1/2 tsp salt
1/2 tsp italian seasoning
1/2 tsp basil
28 oz can of crushed tomatoes
14 oz (or 1/2 of a 28 oz can like I had) of diced tomatoes in juice
1 cup water
1 cup uncooked orzo

Cast of Characters

Add a spray oil to a pan and chop up your onion.

Chop up your garlic and your red pepper.  Add the red pepper and onion to the pan.

Saute the onion and pepper and when starting to release their fluid add the garlic.  If you add the garlic too soon it will brown too much and taste burnt.  Yuck.

Cut the kielbasa up to the size you want,  I like it small so I quarter each round. 

Toss into the veggies.  The great thing about turkey kielbasa is that it adds VERY little fat so you dont have to strain it.

Cube up your chicken and toss that in.

Add the sugar.

Then the rest of the spices.

Then when the chicken has been cooking for about a minute, pour in the crushed and diced tomatoes and the water.  The chicken will finish cooking in the hot sauce.

Stir to combine and increase heat to meduim high.  Once hot, add the orzo.

Peel and cut the shrimp in half.  I like having more bites of shrimp than seeing them whole.   Set aside until the orzo is cooked.

Keep stirring or else you will end up with a gooey mess on the bottom.

Once the orzo is done, about 10 -15 minutes, add the shrimp.  Cook just until the shrimp are done, 1-2 minutes.

Serve in a nice bowl with a side of bread or just like I have it here.. all by itself. 

Pure heaven in a cup.  I was so happy tonight.  HAHA  Nik and Aaron loved it, gobbled it right up.  Just the right amount of spice so they didnt add any hot sauce.  Granted I might have been upset if they had.   Rob is still chemo-ed out, last one was this week, maybe he will get his tastebuds and belly back soon!  I hope so, he hasnt had this yet.  Remember, I told you The Box had hidden it. 

Happy Cooking!!

Chicken W Dijon Sauce

Until about 3 months ago, Rob didnt like mustard.  Then one day he asked to try a lick when I got some on my finger, and proceeded to put it on his sandwich.  That is how life with Rob has been since we started dating.  Nik and Aaron will eat pretty much anything you put in front of them.  That is partly because when they were little they had to try something new each day.  It wasnt a question they just had a new “try” each day.   Now they like just about anything.

The first time I cooked for Rob he ate only about 1/3 of stir fry I gave him.  He ate the chicken and the carrots.  That was it.  Now he is the one pointing out new things to try.   I was so excited when I found a recipe in a magazine (Yes that same Rachel Ray magazine as the orzo recipe) and I mentioned I like chicken and mustard so Rob, in post chemo stupor said go for it.  He was a bit skeptical but hey what the heck right??

So here is my take on that recipe.  I had to do away with some of the items due to lack of ingredients on hand and the salad didnt do too much for me so I made my own. 

Ingredients
yield 8 servings (5 WW point)    adapted from Rachel Ray mag

3 lbs boneless skinless chicken
1/4 cup apple cider vinegar
1/4 cup water
2-3 tbsp dijon mustard
1/2 cup half and half
S&P to taste
Some oil for pan frying

Here is the cast of characters

First step is to trim up and flatten the chicken breasts

Then season with S&P.

Heat up your pan roaring hot with just a little oil. 
Fry your chicken on one side for 3-4 minutes without touching it.  This will create a nice golden brown with yummy crispy bits on the pan.

Flip your chicken when you have a nice golden yumminess and cook for about 3-4 minutes on that side.  Remember that you want the chicken about 3/4 of the way done but not fully for tender juicy perfection.

Take out of the pan and put on a plate and cover with foil to keep warm.

Measure out your vinegar.  As you can see the recipe started out with only one tbsp of vinegar but I found that wasnt enough.  When I put it in the pan it evaporated in about 10 seconds and other than burning my eyes didnt do much for the sauce, so I upped it to 1/4 cup.

Turn the heat down to medium high.  After you have added the vinegar (and the 1/4 cup of water) and got all the crunchy bits off the pan, add your half and half and stir vigorously.  It will look less than appetizing but trust me..

Add the mustard.  As you can see I just eyeballed it. 

Stir to make a sauce then add your chicken back in.. cook for a couple more minutes turning frequently to disperse the sauce onto the chicken.

Serve with sides of your choice.  I did it with rice.  I forgot to put the veggie on the plate.. haha.  This would be so yummy with a nice potato salad in the summer, or sliced and presented on a bed of lettuce for salad.
 

Rob and the kids response was that it was a keeper.  The kids then asked for more.   Best praise ever.  Post chemo Rob ate a half a breast which is alot for him right now. 

Happy Cooking

Summer Curry Chicken w Basmati

Trader Joes is one of my favorite stores.  I am not sure if they have one around where you live and if they dont I am sure you have something similar, but if not I am truly sorry.  It is what my dad would call a hippy store.  My dad is a full blown redneck and to him any place that specializes in all natural or organic or free range, etc is a hippy store.  Personally I love hippy stores.  The produce is better and usually local, the herbs are fresher and they have so many fun and interesting things to try. 

This week at work a friend of mine Lilly had a dish that had been made by another coworker Pauline and I wanted to try it.  So I didnt get to the asian market but thought.. ohhh Trader Joes will have what I need.  Well not exactly so I thought I would make my own recipe. 

The main ingredient besides the chicken is a Summer Curry Sauce from Trader Joes.  If you dont have one around the sauce is made from tomato, garlic, red curry and some spices.   It was a puree and was smooth so I think that if you find something similar it would definitely work!

I liked it, it didnt have the intense curry I was looking for but this was still very good and I will make it again, just need to get some curry paste.  Rob and the kids werent as impressed as I was but liked it enough that with a tweak of extra curry it will be perfect.  I wanted to post this since way since not everyone likes curry as much as I do.  HAHA 

Ingredients 
Yield 8 servings   adapted from Pauline
2 lbs of chicken breast, boneless
1 onion (which was an impromptu addition so it isnt in the Cast picture)
1 jar of TJs Summer Curry Sauce (or similar type sauce)
1 1/2 cup of light coconut milk
2-3 cups of snow peas
salt and pepper
Prepared Basmati Rice

Cast of Characters

Cut up your chicken into cubes and season it with the S&P

Get your rice going while you are prepping the meat and veggies.

While the rice is cooking have the children help you with prepping.  They kind of tag teamed while doing other things so here they are…   This is Aaron!

Niks hands…
Really Mom I dont need my pic in your blog.. but I will smile just in case you use it. 

Dice up your onion.

Saute in your pan lightly sprayed with oil.

Once the onion is done to your liking (we like them a bit crispy still so we barely cook them since they will cook more with the chicken), add the chicken.

Cook until chicken is about 3/4 done****

Add the snow peas and cook for 1 minute.

Add Summer Curry Sauce and stir to  mix together.

Once incorporated, add in the coconut milk.
Stir together and serve over rice. 

****  A side note about cooking chicken.  I have found that I cannot eat dry meat.  If it is dry I simply cant eat it.  I had a gastric bypass a few years ago and it makes me sick, not sure why but it gets stuck and I am done eating.  So I am pretty good with making sure meat is juicy, if I want to eat it that is.  HAHA  So I have found that if I am making chicken with a sauce I only cook it about 3/4 of the way through and it finishes cooking when the sauce is cooking/heating up. 

I was actually pretty surprised by Robs reaction to this.  He said he didnt like curry and he doesnt like coconut but he was having a crappy day so didnt care, if he didnt like it he would have a PBJ sandwich.  He liked it.  Isnt it wonderful when someones palate opens up!

Happy Cooking!!

Spicy Chicken Sandwich

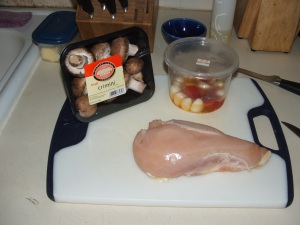
I love spicy.  I love garlic.  I love spicy garlic.  If you read my post about the parchment chicken packets you would know that.   On the olive bar at most grocery stores there is this great mix that is garlic and hot peppers in olive oil.

It is so spicy and garlicky goodness.  I will just pop the garlic in my mouth and savor the impending dragon breath!  It is so good with chicken I use the two together quite often.   Here is yet another take on it.   I had bought some mushrooms and while Aaron and I are the only ones who like mushrooms to eat,  Rob and Nik like the flavor they give. 

Ingredients

5-6 chicken breasts (about 2 1/2 lbs)
Smaller package of mushrooms ( or bigger, I just happened to have a small one)
7-8 cloves of the marinated garlic
1-2 pieces of hot pepper
salt and pepper
reserved hot oil

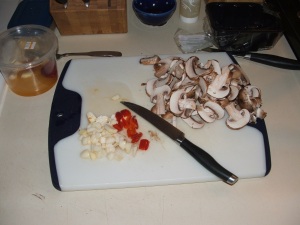
To start off, slice your mushrooms and chop up your garlic or slice.

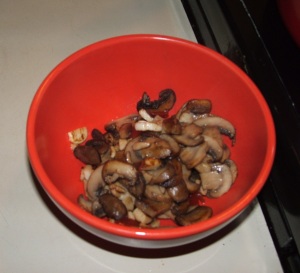
With some of your reserved oil saute your veggies until the mushrooms have wilted.


When cooking boneless chicken breasts, I always suggest pounding them so they are the same thickness all the way across and that all the breasts are of the same thickness so they all cook uniformly.  This is also a trick of the eye.  We as a society are always eating bigger portions than we need, by taking a piece of chicken and thinning it out, it makes it look bigger.  And it covers the roll better.  LOL

Remove the veggies.  And put a bit more oil in the pan.


Saute your chicken breast and get a good crust on one side and flip!


Put your veggies on top.  This way they wont get too crispy (unless you like them that way) and they will stay warm and infuse more flavor into the chicken.

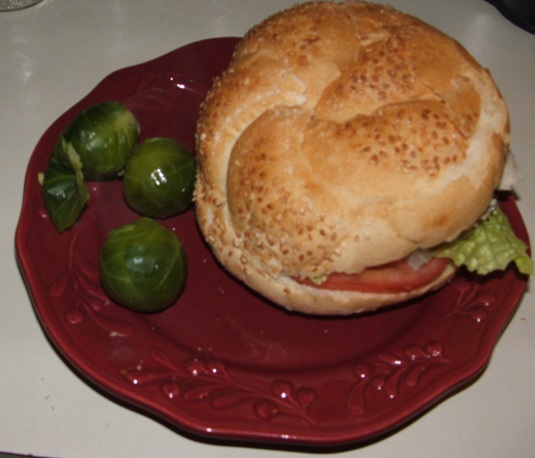
When done split a bulky roll, onion roll, hamburger bun or even a tortilla wrap and pile with lettuce, tomato and some of the warm veggies.  If you like you can add mayo or whatever but it didnt need it.   Then drop your chicken on it ( I had a huge roll and the littlest piece of chicken so mine looks funny.  The kids were almost done theirs before I got mine ready for picture or I would have shown the size difference by pounding).


This is very food group balanced; chicken for protein, roll for carbs, veggies for veggies and garlic for spicy; so all i added was some brussel sprouts!


I hope that you can have fun with this recipe as Idid.  And that you can find ways to make new and fun meals with a few ingredients.

Happy Cooking!!

Sun Chip Chicken

Rob and I have become Pampered Chef snobs.  We love most of the gadgets and the stoneware is our favorite baking tools.  You can see that and our Kitchen Aid prominently in many pictures and they will remain so for many, many years as our main baking accessories.   Pampered Chef, if you have not ever been to a show, is a home party thingie where you get to see a cooking demonstration and have friends over and eat and the hostess, ME, gets free kitchen stuff.  What could be better. 

There is not enough time to regale you with the wonderfulness of the stoneware.  It makes baking so much better and it makes baking this recipe so much easier.  I will also mention that this recipe is derived and adapted from one of their cookbooks. 

Who here likes chicken?  Ask Aarons girlfriend Corrie if we like chicken in this house.  The poor girl has chicken almost every time she comes over, literally almost every time.  Haha, poor kid.  Luckily it is pretty easy to cook and oh so easy to diversify!   This recipe was taken from a PC cookboolk and made even more simple.  This is one of Robs specialties to cook.   And it is so easy!

Ingredients
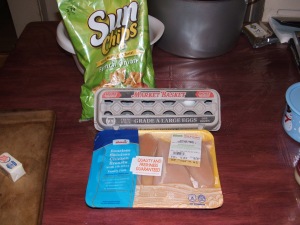
1 full size bag of flavored Sun Chips  (our favorite is French Onion but any will work)
3 lbs chicken boneless chicken breasts
2 eggs
1 ziploc bag

Thats all it takes for ingredients!  And it can take as little as  30-40 minutes to prepare if you want a quick dinner.

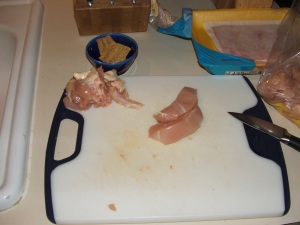
First cut up your chicken to desired size. You can make fingers but we have found that cubes work best.  I like them about 2-bite sized. 

Take your ziplock bag and crack the two eggs into it and beat them until slightly paler in color, 20-30 seconds and then add your chicken.  Close and knead the bag to disperse the egg into the chicken.   Let this set for atleast 10 minutes.  Rob and I personally like letting it sit for an hour or so, the egg sucks up into the chicken and makes it super juicy.    Next crush your chips up to a pretty fine crumb with some bigger chunks, there is no real wrong way to do this.  Haha  Pour your chicken into a bowl and pour your crushed chips over it and stir until combined.
 

Pour into your PC stoneware (the big bar pan) or a parchement lined cookie sheet if you dont have PC.  It will be a bit tight but dont worry it is good this way!!


Put in the oven for 18-22 minutes, depending on your chunk size and cook until done.  Serve with your favorite sides and if you want, some dipping sauces.  So good, so easy and actually quite economical.  


This whole pan of chicken was made with items on sale so this whole pan cost under $9!! And it is enough food for Rob and I, the two endless stomachs, NIk and Aaron, to have dinner  AND enough left for Rob and I have to lunch the next day!!   Cant beat that!! 

Happy Cooking!

Parchment Chicken Wraps

Let me first say..  I have no idea where I got this recipe… I vaguely remember reading about it some where right after Rob and I got married.   It is so easy, versatile and personalized for anyones taste.  The theorys is that the parchment allows for a steam action so the flavor you add is infused into the meat but it also allows for steam to escape so it doesnt blow up.  LOL  You can use anything you want in these and it is really easy to do.   Here is how we make ours.
Ingredients

Parchment paper
Chicken breast, boneless
Grape tomatoes (or you can use Fire Roasted or Sundried tomatoes)
Calamata Olives and the garlic/hot pepper mix from the olive bar, make sure you get some of the juice/oil
Proscuitto if you have/like it
Salt and Pepper
Fresh herbs (if you have some which i didnt today)

The ingredients

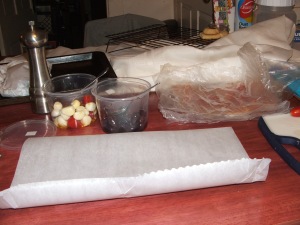
Trim your chicken breast and lay out your double layer of parchement.  I make the piece of parchment about 9-10 inches wide when it is folded in half.    Lay down your proscuitto (again optional) like this:

Slice your garlic, hot peppers, olives, herbs, tomatoes.. whatever… and lay it along the chicken like this:

And if using proscuitto, lay another couple pieces over the top.  Add your salt and pepper to taste and close up the paper packets.  Put them on the cookie sheet and put in a 425 degree oven for 20 minutes.

Disregard the different colors of parchment.. I ran out of one kind..  They come out beautiful and you can make them completely personal.   We have used pineapple, onion, other veggies.. drizzled with sauces, etc.  The parchment makes them perfect.

Serve with your favorite side.. or in tonights case, your husbands craving.  LOL  Fries.. but goes well with potatoes and rice and salad.. so yum.

Happy Cooking
Kim

Orange Chicken a la Kimmi

First of all i would like to start out by saying that I love chinese food.  I worked at a chinese restaurant in Plymouth NH when I was in college.  Still think that they make the best Crab Rangoon ever!!  HAHA  So when I found this recipe on 365 Days of Crockpotting  I was determined to switch it up.  I dont really care too much for crockpot cooked food.  It has a taste that I dont really like but some things are good.  But this was just aching for me to adapt to my family.  So here it is…. Orange Chicken a la Kimmi.
Recipe

3 lbs of chicken cut into 1 inch cubes
1/2 cup flour
1 can of condensed orange juice with no pulp, defrosted  (lemonade is good too)
2 tbsp of brown sugar
1 tbsp of balsamic vinegar
1 tbsp KOSHER salt  (if you use regular salt then only 1 tsp)
3 tbsp of ketchup
3 tbsp oil

-adapted from 365 Days of Crockpotting

The ingredients….

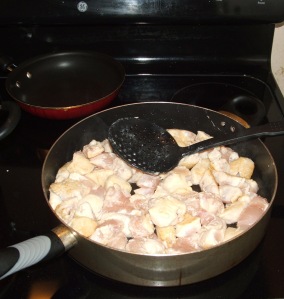
Take the cut chicken and the flour and put it in to a bag and shake to cover.  In a large skillet heat the oil until blazing hot but not smoking..  then pour the chicken in and spread out.

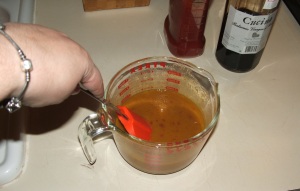
Brown on all sides and let them get a nice golden deep brown!!  YUM  In the meantime.. mix all the rest of the ingredients in a bowl or measuring cup. 

When the chicken is about 2/3 of the way cooked through pour the sauce over and bring to a boil. 

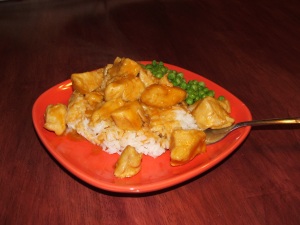
Let boil and thicken for about 3-4 minutes.  Serve over rice with your favorite vegetable.  Yummy and much healthier than take out.  This recipe takes about 25 minutes to cook from cutting chicken to finished product.  Just make rice like you normally would (we make sticky rice for this). 

I love this recipe and so does Rob, and so did the kids, until tonight.  The boys told us  after I had started making it, that it doesnt do much for them.  LOL  Nik doesnt like citrus meat and Aaron had some for dinner and then said it didnt work for him this time.   WHATEVER.. lol   If you make it and love it let me know.

Happy cooking

Kim