Flipping Pizza

My husband is a many talented man.  Not the least of which is that he can flip a pizza.  I will have to take a picture someday of him with pizza dough sailing through the air.  Alas to that happening anytime soon, as he hates the post chemo pallor to his skin and his almost balding appearance.  He was not happy with his picture in the Cheese Its post, so I am just going to be mean to you all here and post a picture of one of his homemade pizzas.  We still buy the crust, and he stretches and flings it in the air until it is perfect, but the rest is our own thing, homemade sauce, hand grated 4 cheeses……  soon I will post a recipe and pictures but for now….. this is all I can offer.  Maybe if I get enough comments he will take pity on everyone and let me take a picture or two..


Maybe I can even get him to do a guest blogger and write up a tutorial about flipping pizza… 

Happy Flippin!!

Recipe Swap! Baked Campanelle with Spinach and Meatballs

This is the second in what I think will be quite a few of these recipe swaps.  On my What Cooking board we have a group of fellow foodies who love cooking and baking and wanted some new recipes! So one of the ladies coordinates these recipe swaps.  She collects the recipes from the participants and then randomly sends them out to their new chef.   This was the one I won!

I did the recipe pretty much as listed except I made my own meatballs, which is back in the blog a couple weeks/month (time is running together) and I used a different pasta.  Here is the original recipe by Jey.

My review….. I liked it, alot.  I will have to tweak it a bit to make it more WW friendly but I loved how creamy it was.  I LOVED the spinach and the basil I added.   The kids loved it.. and ate it up pretty quick!  For them it was like a meatball lasagna!  LOL   Mr Pickypants wasnts as impressed.  He isnt a huge fan of ricotta, so this didnt do much for him.   We will see how well he likes it once I tweak it a bit. 

Ingredients
I didnt put this in WW for point because I was scared too.. so this was a splurge meal for me.  It took about an hour to make including baking time.

1 onion chopped
4-9 cloves of garlic (the recipe called for 4 I used 9 because that is what Rob peeled)
1 14 can diced tomatoes
1 jar of pasta sauce
1 box of pasta cooked aldente.  I used campanelle, they look like trumpets!
1 16 oz bag of spinach
1/4 cup fresh basil
12 oz of ricotta
Pinch of nutmeg or grate fresh
S & P
1/4 cup shredded parmesan
4 oz of fresh mozzarella
25-30 Meatballs

Cast of Characters

Set up your pasta pot and fill w salted water.

Chop the onions

And the garlic

Add them to another dutch oven/ 8 quart pot.  No  need to add oil or anything.

Turn the pot onto medium high, and then drain the tomatoes.

Add the juice to the pot and use that to cook the onions and garlic.  No need to waste the flavor or to add any oil.

Next is to prep your spinach.  In a large bowl tear up the spinach. If using baby spinach then you really dont have to but if you are using regular I tear it up and take out the large center stalk.  I think they are bitter. 

Add the tomatoes once the onions are translucent.

And then the pasta sauce.

And then the meatballs.

Let simmer for 20 minutes while you finish the rest of the dish, stirring often.  I love the smell of sauce cooking.  The warm richness of the tomato and the onion and the spices!  I love alot of basil in my pasta which is why I added basil rather than parsley (like the original recipe used).  One of my favorite things to eat is a caprese salad.  Tomato, basil and fresh mozzarella drizzled with balsamic vinegar!  HEAVEN….  Oh and extra salt!    Okay back to this recipe….. haha   cut up your fresh basil into ribbons.

Add to the bowl with the spinach.  I like the barely cooked/slightly crisp aspect of the spinach and the sharp bite of the basil is a nice contrast to the creamy sweetness of the ricotta.


Grate the nutmeg into the bowl with the spinach/basil.

Then the salt and pepper.  You wont need too much salt since you salted the pasta water.

Check on the pasta frequently, you do not want it too cooked or else it will turn to mush in the oven. 

About this time your meatballs and sauce should be ready.. Just turn it off because you dont want it too thick.   MMMMMMMM I love the smell of sauce and meatballs cooking.  I just want to dig in and eat like 3-4 of these on a piece of garlic bread! 

Add the ricotta to the spinach reserving 3/4 a cup or so for the top, and combine.

Drain the pasta when it is al dente.

Then add quickly to the spinach.

Add the meatballs and most of the sauce leaving some in the bottom….

Then mix to incorporate. 

Dump back into the dutch oven..

Dot with the remaining ricotta, and the parmesan and fresh mozzarella.  Bake for 10-15 minutes  covered in a 350 oven.  Remove the cover and bake until the desired browning melting has occurred..

Then plate up with your favorite veggies.

This was a melty yummy fresh tasting wonderful mix of flavors.  I adore ricotta so this worked for me.  I would cut back to about 1/2 a container next time to make it more palatable for Rob but for the most part, this was a success with the recipe swap..

Happy Cooking and Swapping!

Worlds Best Eggs

Okay maybe not the worlds best, but certainly my favorite and best eggs ever.  I was playing around last weekend and made one for myself and had to wake Aaron up so I could make him one!!  I had a hard time coming up with the name since it has mexican, canadian and french influences in it.. so I said its the best of both worlds.. and  now they are the worlds best eggs. 

I adore breakfast.    I think that it is the funnest meal of the day,  and I especially love Sunday breakfast.  I love making it in my pjs and eating in my slippers with my family.   It is one of the few meals lately where I actually get to sit and not have to worry about rushing off to get something done because I try very hard to make sure that Sunday mornings I get atleast one hour of relax time.

So without further ado..   Worlds Best Eggs (well my worlds anyway, hehe)

Ingredients
Yield one “omelet”  if made with 2 eggs 7 WW points
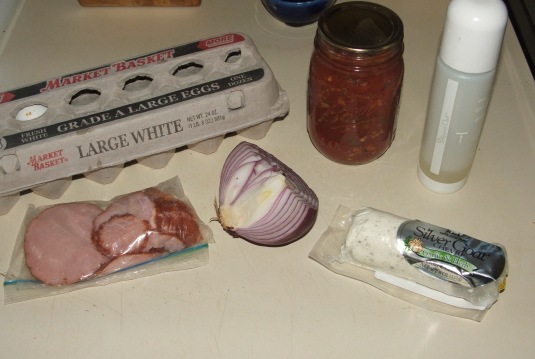
2 tbsp chopped red or vidalia onion (yellow is fine too just not as sweet)
2 tbsp salsa (see note below)
1 oz of canadian bacon
2 eggs
1/2 oz of chevre or other herbed goat cheese

Cast of Characters

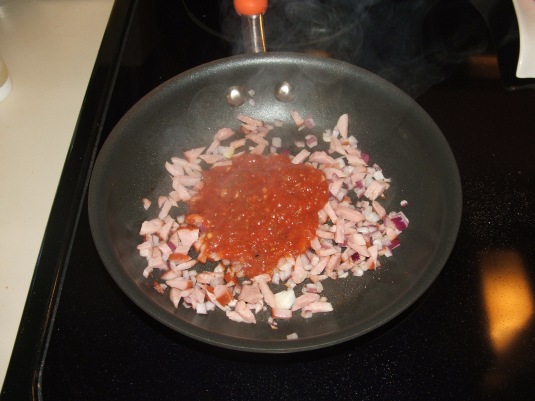
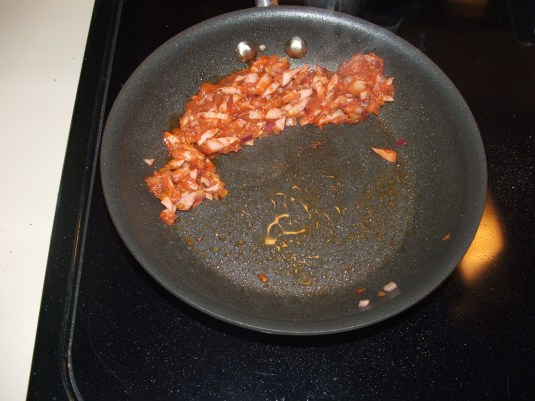
In a small frying pan on medium heat add your chopped onion and using a knife or in my case, your kitchen scissors, chop up the ham into little pieces.

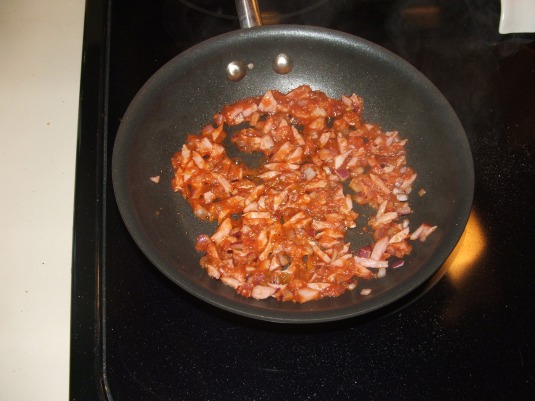
Saute them up until they are slighly browned. 

A word about salsa.  I make my own.  I love my salsa.  That is all.. Oh wait..  One more thing.  I love chunky salsa, Rob doesnt.  So there is always a jar of my salsa that he has pulsed in the food processor so it is smooth and chunk free.  I find this to be sacrilege but he likes it so I try not to let it bother me.  I wanted the salsa throughout the eggs for this recipe so I did the unthinkable and used his pulsed up salsa.. I feel dirty. 

Stir it around and cook for a minute or two until the fluid is gone.

Move the “stuff” off to one side and spray with a bit more pam or oil, then do the same with the other side.   Eggs are a pure protein and as such release no natural lubricant of their own.  They have no fat or “fluid” so they will stick without good lubrication!

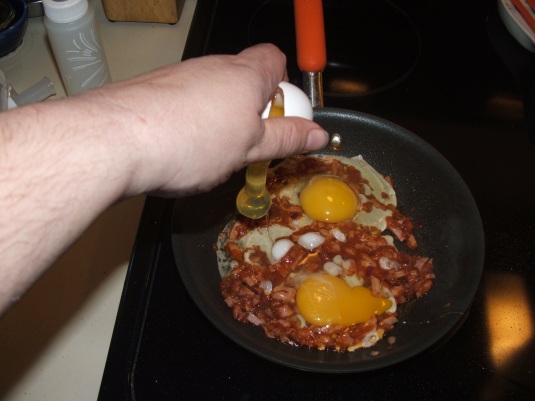
Spread the stuff back out and drop your eggs on top.  I use two usually but this picture has three eggs in it, Aaron is a growing boy!


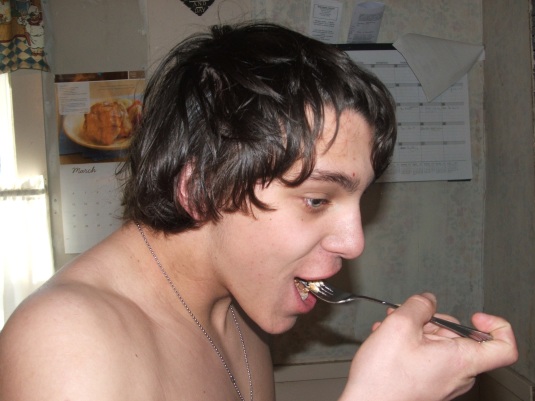
Scramble the egg around a bit so you dont have giant pockets of yolks.   Flip and plate.   Give the kid a taste of just the yummy eggs..

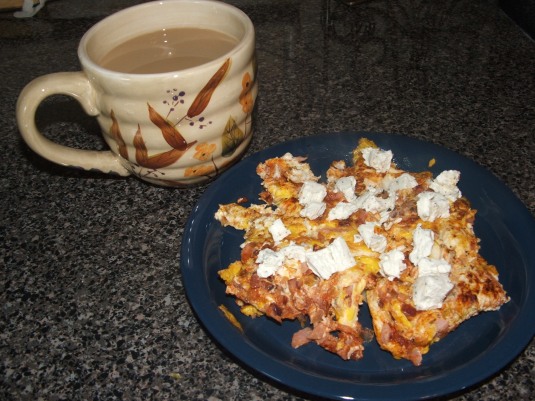
Then crumble the goat cheese over the top.  It will melt slightly and soften.  Serve with toast and coffee, or juice, or a mimosa!  No mimosa for the child though.

I was worried that the tangy taste of the goat cheese would mask the sweetness of the onions or the gentle mild spice of the salsa but they meshed so well together, that I can honestly say this is my favorite way to have eggs.   I actually had them today without the canadian bacon and they were fantastic too.  I usually dont buy alot of goat cheese because it is expensive and the kids will eat a whole log in about 10 seconds, but this recipe might just make me have to keep some in the fridge. 

Happy Breakfasting!!

Gingerbread Cheesecake

I realized as I was looking over my blog posts that I have very few sweets on here.  This is to help alleviate this travesty.   I have had this recipe for years.  I think my Mom got it from a magazine and then gave it to me.  I have made it 5-6 times and it is always a huge hit.  I dont make it often cause I would eat it all by myself.  I adore anything with molasses, ginger or cinnamon.. and this has all three!!  I think cheesecake is heaven on earth anyway but this is a crossing of two forms of greatness.

Making cheesecake can be tricky.  You can over cook it and it is dry, under cook it and it is mucky (Robs favorite word, mushy and yucky mixed), or have it crack or the crust be too crumbly.  I personally dont really need much crust but Rob and the kids love crust.   For me a dusting to keep it from sticking to the pan and we are good.  Rob especially, want the crust almost as thick as the cheesecake portion. 

There are some tricks to helping with the cracking issue.  Here is what I have learned and they work for me everytime.  When you are done mixing the batter, beat the bowl on the counter to bring up any air bubbles, hence using metal bowls.  Bake at 300, it may take a bit longer but the cake sets better.  When it is done, dont take it out of the oven, turn the oven off, open the door partly and let is stay in the oven for 40 minutes so that it cools slower.    Now that being said, who knows if these are all the reason why my cheesecakes dont crack but it works for me.  HAHA 

As you know if this isnt your first time reading my blog, I am on Weight Watchers.  And I love dessert.  And they dont mix well.  Which sucks.  BUT being the good girl I am, I put it in the recipe builder on WW.com and cringed the entire time.  For 1/16th of a 10 inch cake, it was 6 points.  Which isnt bad.  I used low fat cream cheese and a slight change in the crust to bring the points down but for the most part I left it as is.  If you do any tweaking (which you know I am a strong advocator for) let me know of your result in a comment!   This originally had a gingersnap crust (which is heavenly) but in an attempt to make it a bit healthier, I changed it up.

Ingredients
yield: 1 10 inch cheesecake   serving 1/16th    WW points  6
16 saltine crackers
4 whole graham crackers (try flavored if you want)
3 tbps sugar
1/4 cup butter
24 oz cream cheese at room temperature
2/3 cup sugar
3 eggs at room temperature
1 tbsp flour
1 tsp ground ginger
1 tsp cinnamon
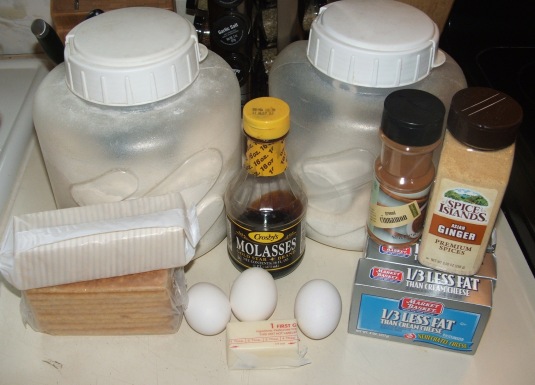
1/4 cup molasses

Cast of Characters

First preaheat your oven to 350.  In a food processor, grind up your crackers into fine crumbs.  I use saltines because they are lower in points and less sugar then graham crackers. They cut down on the intense sweetness.  Rob, the crust king, even likes it this way.

Put them in a bowl with the 3 tbsp sugar.  Melt your butter and pour into the cracker and sugar mixture. 

Mix the butter in thoroughly. 

Press into a 10 inch springform pan, making sure you go up over the lip of the springform and bake for 15 minutes in the 350 degree oven.

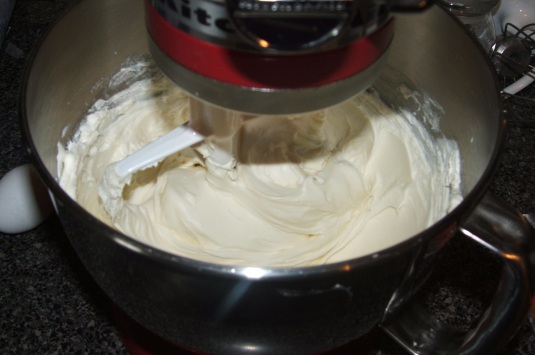
When the crust comes out turn the oven down to 300.  Take the 24 oz of cream cheese and the 2/3 cup of sugar and put it in your kitchenaid, or with a hand mixer, beat on medium speed for about 30-45 seconds stopping once to scrape down the sides.

Add the eggs one a time, mixing for about 10-15 seconds between.

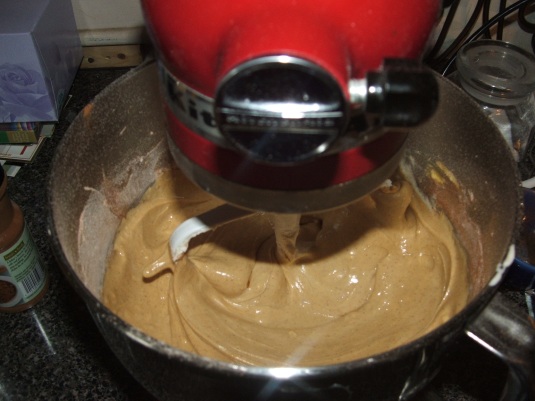
Add the flour, spices and the molasses. 
Mix for about 30 seconds more, scraping down sides.

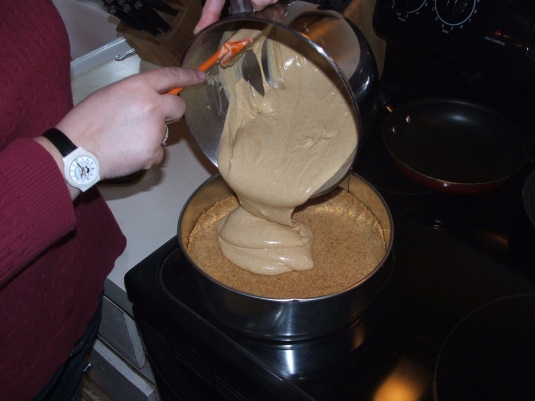
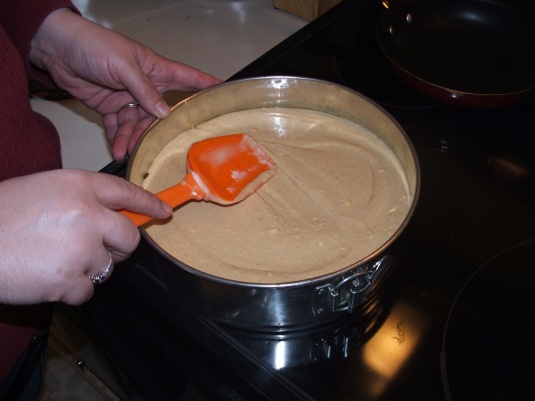
One last final mix to make sure you are fully combined, pound on the counter until bubbles are released and then scrape into the pan.

Smooth the top and put in the oven on the middle rack.  I know alot of people like to foil wrap it and put it in water.  I have never had luck with that and found this works just fine. 

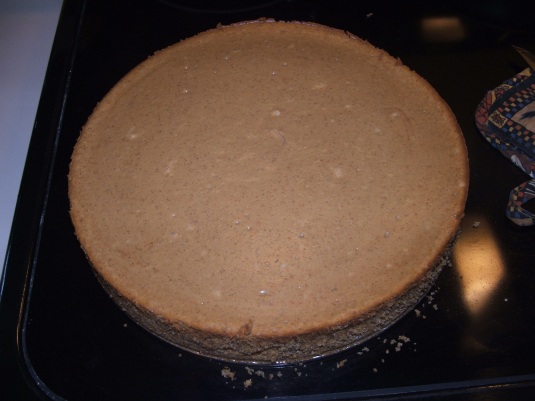
Bake for about 50 minutes and check for done ness.  I have no particular way to explain how I know it is done other then the center is not giggly and it looks dull rather than shiny and doesnt feel spongy when touched lightly.  Once you have determined it is done, turn off the oven, prop open the oven a good 5-6 inches and leave in for 40 minutes to an hour.
Run the knife around the edge and losen the pan.  Take off the ring and you can present this way. 

Then garnish as you like.   I like strawberries with just about everything.

Trying to take this picture made me realize how badly I need a new camera.  I dropped it yesterday, for like the 10th time and this was the best of the 9 pictures I took. 

But about the cheesecake…… 1 1/16 is not enough of this yumminess but it is also just the right amount.  This is incredibly rich and flavorful.  It is sweet and has the bite of the ginger and molasses without being too sweet.  I served this when Rob and Nik were having the guys over and it was a huge hit.   It has always been a hit in this house so I shouldnt have been surprised that it went quickly.

Happy Baking!!

Homemade Cheese Its

You remember me talking about how we like to make things from scratch that are easier to buy.  Well Rob came across this recipe in his Ready Made magazine for home made Cheese Its (yes i know they aren’t spelled like that but I have no idea about copyrights on names) and I had to try them.   BUT they were way too high in points for WW so I tweaked.  Are you surprised??  If you are, you havent been reading my blog enough.  Haha.

The original recipe calls for only 5 ingredients.  I added a couple.  First of all I changed the cheese to low fat.  I KNOW, the sacriledge!!  Cheese is the epitome of yumminess and to a dairy farmers daughter anything that uses milk is essential to life.

I love cheese crackers.  I love the taste, the texture, and goodness knows I love me some cheese.  I think that has been the hardest part of WW has been giving up cheese and its products.  You can eat whatever you want on WW but honestly 1 oz of cheese can be 2-4 points.  That is alot of points for such a small amount, so I have been sparing.  This recipe, makes about 15 dozen!!  which when points are added up.. is only 2 points per dozen!!! Yeee Haw

Ingredients
yield: 15 dozen   adapted from Ready Made magazine
1/2 stick butter
6 oz low fat sharp cheddar
2 oz hard italian cheese (pecorino is what we had in the house)
1 cup flour
1 tsp salt
1/2 tsp garlic powder
2-3 tbsp cold water

Cast of Characters

In your stand mixer, add the butter.

Grate cheese into the mixer.

Add the salt.

Beat the butter, cheese and salt on medium until incorporated.


Add the flour.

Mix until the consistency of coarse sand.

We decided to add some garlic powder at the last minute.

Slowly add water 1 tsp at a time while on medium speed……

Until it comes together.

Here is where I will tweak the recipe the most in the future.  The recipe calls for putting it in the fridge for an hour.  I will NOT be doing that.  It made it hard to roll out.   I ended up having to knead it a bit to soften it up.  So next time Iwill just cut it in half and roll away. 
So start off with a lightly floured surface.  I love my Pampered Chef roll mat, barely have to use any flour.

Pat half the dough into a disk.

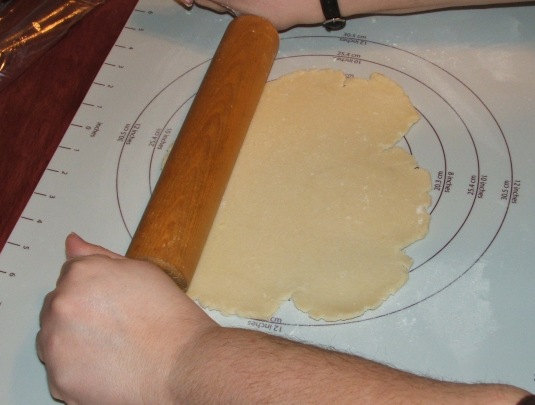
Roll it until it is thin.  The recipe said 1/8 but i dont think that is thin enough.  So I would roll it as thin as possible.

Cut with a fluted roller or even just use a knife if you dont have a rolly thingy.

Take off the not pretty edges to roll out later.  Here is what they will look like.  See how they are not even.. I love that about homemade.

Put on a parchment lined baking sheet and poke the center out with a chopstick.  This will help them from puffing too much.

Bake at 375 for about 15-17 minutes.  These were in for about 14 minutes.

I think they like them…..

Even Rob who hasnt been feeling well enough to eat real food for 5 days, couldnt resist them. 

The results.  Well they were soooo tasty but a bit thick.  They called for rolling 1/8th an inch thick. I will go thinner next time and bake a little less time AND I will definitely use my Pampered Chef stoneware so they dont burn.  But they were so good and actually pretty fun to make.  As you can see by the masculine hand in some of the pictures, Nik made these with me and we totally had a great day baking and chatting.  Rob was in bed, until he smelled them done and had to sample, and Aaron was at Corries house so this was a fun project for Nik and I.  Granted I think I have about 4 dozen left after Rob and Nik finished but it was so worth it. 

Happy Baking!!

Orzo Risotto with Spinach

I am on Weight Watchers (WW).   I joined 4 weeks ago and am doing pretty darn good.  I am happy with it.  I had a gastric bypass a few years ago and lost over 130 lbs, which wasnt as much as I wanted to lose but nothing to sneeze at.  I have a heart condition that manifested from losing the weight and it really slowed down my progress.  Add on getting married to someone who is a burgeoning foodie, having twin teenage boys and my own love of cooking and you have a recipe for weight gain.  Hence WW.    I wanted to make my own food and my own choices.  So here is one of the recipes I have added and tweaked and made my own. 

It started out in a Rachel Ray Mag.  Dont hate.  I think she is fun and bubbly and while entirely way over exposed, I like her style and her outlook on food.  If that changes the way you think of me, well I hope we can still be blog acquaintances!   This was in her March edition.  Well what this recipe started out as, is in the March edition.   Now is has been Kimmi and WW-ized!

One of the issues with rice (and some pasta) is that in WW it is so high in points.  I love rice; white rice, brown rice, basmati rice, jasmine rice.. hell if there is rice in the name I like it.  Even rice wine vinegar. Granted that has wine in there too which gives it a leg up!   So when I saw this I thought.. mmmmmmmmmm orzo…. rice…. orzo is 5 points per cup… arborio is 18 points per cup.  Wooooohoooooo  I was so excited.  Then I looked at the rest of the recipe.  There was no way that I was going to be able to make this points manageable unless I worked with it.  Plus Rob wouldnt eat some of the stuff in it.  So we were off to tweaksville.   And it worked.

Ingredients
Yield: 8 1/2 cup servings

4 cups cooked orzo (I just made 3/4 a box, the left overs are for salads)
1 small onion
S&P
1  1/2 cup half and half
1 cup pecerino/asiago/parmesan (italian hard cheese) fresh shredded
2 cups spinach with the spine removed (or use baby)
reserved pasta water (save some out when draining the pasta)

The Cast of Characters

Dice and lightly saute your onion with some S&P in a lightly sprayed pan.

Meanwhile shred your cheese.  The recipe originally called for shaker cheese.  I dont use the stuff.  It tastes like powder to me.  If you use it and love it, great, give it a try but it just isnt for me.  So I shred my cheese fresh, it tastes better and in the end it really isnt all that much more expensive if you watch the sales.

Take the spine out of your spinach.. you know, that part of the stalk that is a bit tough and not as yummy.. and then break it up into smaller pieces.  Or you could just use baby spinach, which would be easier, if I had that in the fridge that is.  So full grown tough spined spinach we used..  its still yummy.

The next couple steps I didnt take a picture of.. I hope you can forgive me.. Please?  

Okay, thanks for forgiving me.. I knew you would, eventually.   Oh the directions.. okay.

Add the half and half to the onions and stir together. Add the shredded pecerino and bring to a simmer until thickened up a bit.  Then add your orzo.  Stirring to incorporate.  Add some of your reserved pasta water to make it a bit creamier and thicken up to your desired creaminess/thickness.   

Toss in the spinach and stir to incorporate (yeah pictures are back)


Serve with whatever your little heart desires.  I served this with some edamame and some sliced cooked chicken. 

In the end, I just sort of mixed it all together.   Very creamy, not too cheesy and other than adding a touch more S&P next time, oh so worth the 6 points for the 1/2 cup serving!

Happy Cooking!!

Baked Ziti with Sausage

I usually like to make most things from scratch, my own spaghetti sauce being one of them.  I am in school and dont have time to breath so spending an afternoon making sauce isnt really in the plans for right now.  So I “cheated”.  I used can sauce to make this dish.

Let me lead off by saying that baked pasta doesnt really do it for me very much.  I dont like how the middle turns gelatinous and the edges get crispy.  Not something I like usually.  BUT two weeks ago I was in a meeting for something for the kids and met this woman named Stephanie whom I find out had just lost her home and all her belongings in a house fire and she and her husband are living in a hotel, eating out every night.  This sounds like torture to me so I offered to make her a casserole or some sort of a home made meal.

Well lo and behold, she took me up on it!   When I didnt hear in the first week I figured she assumed I was not serious and forgot about it.  I got an email last week asking if the offer still stood!  Of course it did.   I wouldnt have offered if I wasnt serious.  Unfortunately I was back in full swing of school though and wouldnt be able to put as much time into this as I would have liked to.  SOOOO here is my solution… Baked Ziti.. easy peasy, fast and easy!   This made two 9×13 casserole dishes.  We gave the one away and will have the other tonight for dinner. 

Ingredients 
2 boxes of your favorite pasta
1 large onion
1 large green pepper
4-5 cloves garlic
3 lbs of italian sausage, sweet or hot or a combination
3 cans of your favorite sauce (Rob likes the cans of all the store sauce)
1 can of crushed tomatoes
Some sweetener if you like the sauce a bit sweeter, I used two Splenda
Salt and pepper
2-3 tbsp Italian seasoning
2-3 tbsp Parmesan cheese or in this case some of a parmesan and garlic mix
Shredded cheese (I know, I know, I said in other posts I never use this.. well I do when I am in school!)

I am totally missing the veggies in this picture…. it was 7 am what do you expect!

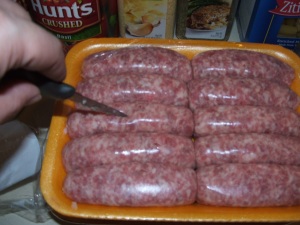
Start off by poking each sausage with a hole. 

Then set up your sausage baking rack.  We always bake our sausage.. so much less fat this way.  Simply line a pan with aluminum foil and put a tray on it.. arrange your sausage and bake for 35 minutes on 350.

Now peel your onion and garlic and seed your pepper and chop it up fine with a mini processor.  I generally prefer chunks but both Stephanies and my husband prefer no chunks in the sauce.. hmph!   Get them sauteing in a lightly greased dutch oven.

Check on the sausage which is now making the house smell yummo.  Give them a couple more pokes with a knife so that the fat can drain out of them and onto the aluminum lined pan.

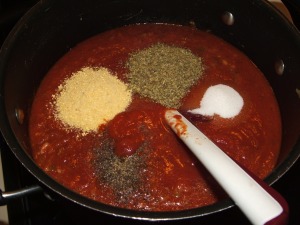
Add the sauce, tomatoes and spices.


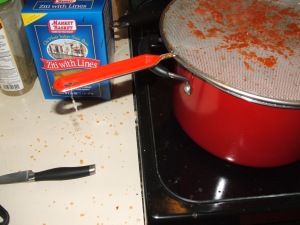
Simmer your sauce.. but dont leave it to be watched by the son while you go study for your exam or you will end up with a mess… which I made him clean up.. and told him to get off the phone while cooking!  LOL

Once the smell had permeated your home (and the 35-40 minutes are up) you can take your golden and delicious sausages out of the oven, leave the oven on since you will need it soon.

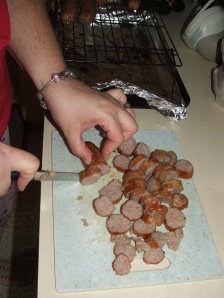
And slice them up once they have cooled slightly.

Stir the sausage into the sauce.

Boil salted water in a large stock pot and add your two boxes of Ziti.. or Bowties.. or Macaroni.. whatever floats your boat.

Drain pasta and mix with sauce.

Pour into the lightly greased pan.

Cover with your shredded cheese.  And bake for 40-45 minutes or until the cheese is melty and gooey!

Oh and my solution to the gelatinous and crispy issues…… dont cook your pasta fully.. a little less done than al dente.  AND a bit extra sauce around the edges.

This recipe took about 2 hours to make but that included the 40 minutes to cook the sausage and the 40-45 to bake the ziti.  It is filling and hearty and since you got rid of alot of the fat from the sausage it is only mildly artery clogging.  HAHA   All in all an easy dish to make and very tasty!   I cant wait to hear if Stephanie and her spouse liked it. 

Happy Sharing!!

Meaty Twice Baked Potatoes

About 3 years ago Rob and I went on this ridiculously radical diet.  I was eating just turkey burgers and salads.  I lost a ton of weight in a couple weeks but I was miserable.  No dairy, no beef, no sweets, no carbs.  I mean it was absolutely structured.  My life doesnt function with that much structure.   BUT we did get a few recipes out of it.  Anyone that knows us knows that we can find recipes or meal ideas anywhere.   We took this basic idea from the terrible diet, and made it better.  HAHA  We added some diary and alot of garlic.

Well recently I joined Weight Watchers and Rob will too once we get the okay from the oncologist.  I know that they worry about people on chemo losing weight but for Rob the chemo diet didnt work.  He has not lost anything and he is about 100 lbs over weight, as am I.  So this was a great move for me/us. 

Which brings me back to this recipe.  I made it the way I always have and decided to plug it into the Points Plus converter.  I didnt fudge on the ingredients and was pleasantly surprised to find out that it is only 9 points per serving.  Yeah for yummy and not too bad a value.

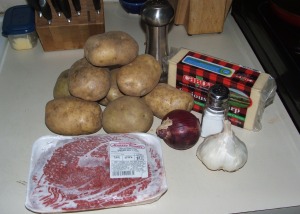
Ingredients8 large baking potatoes
1/2 lb lean ground beef/ turkey  ( I used 93% lean)
10 cloves of garlic
1/2 large red onion
1/4 cup half and half  ( or milk, i was out and used the half and half to finish it off)
2 tbsp butter
Salt and Pepper

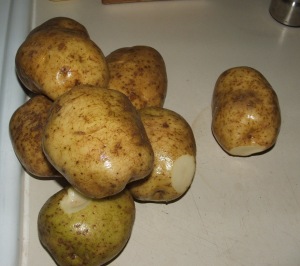
Thoroughly wash and clean up/remove blemishes of your potatoes.


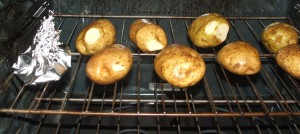
With a piece of aluminum foil, take your unpeeled garlic and a couple drops of water and make a pouch to roast your garlic in.   Throw that and the potatoes into the oven.   Please do not look at how dirty the oven is!!  It needs to be turned on to clean tonight.

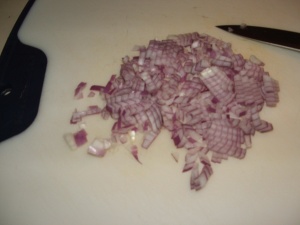
Chop your onion fine.  You want the flavors to meld.


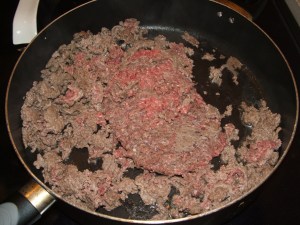
Brown your burger.  I used beef (and that is what i used in the WW recipe thingie) but this is soooo very good with turkeyburg too.


When the garlic is soft and the house smells great, take it out of the oven and put aside until the potatoses come out.  Then have your son take the garlic and start the messy job of removing the paper peels.

Put the garlic into a large bowl.

And add the onions to the browned and drained beef.  Stir until the onions have softened up.


Slice the potatoes in half  lengthwise and remove the meat of the potato and put it in the bowl with your garlic.  Put the potato skins on the baking sheet and put in the oven for about 10 minutes to crisp them up.


Add the half and half/milk and the butter along with some salt and pepper.  And mash!!!

Add the browned meat and onion and mix again.


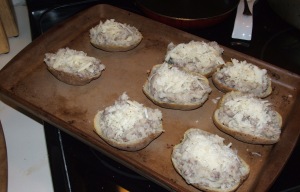
this isnt really pretty looking.  I can be honest, it looks kinda ucky.. but it is good.   Stuff each half with enough to fill it.  You dont want to go to far over the top or you are going to have to get rid of some of the skins. 

And Rob took this “perspective shot”  not sure what it is a perspective of but he likes to take pics and be involved so this one is for you honey!


Top with cheese.


And bake for about 30 minutes..  but dont have the kids be the ones in charge of the timer.. or they will be a bit dark like this.  HAHA

I served this with some corn for the kids and a small salad for myself.   I mean a small salad!  I was too full.  I think in the future I might just start off with one.   Which is half a serving.   

As with all my recipes, they are open to playing around with.  YOu can change the flavor by adding spices, different cheeses and or trying different potatoes.  I have made these with Yukon Gold potatoes and they were very good.  The fun thing about cooking is the mixing it up!!

Happy Cooking!

Butternut Squash Stuffed Shells

This is one of my most asked for recipes, hands down.  When I have it for left overs I have to bring in extra for a couple people in my office who love them, right Emily!?!!  These are semi labor intensive but like my last post where I talked about freezing ahead, I make two (this recipe makes two 9×13 trays) and freeze one.  They freeze amazingly well.   The butternut squash I made is slightly sweet and smooth with that rich taste that only copious amounts of cheese can give you.

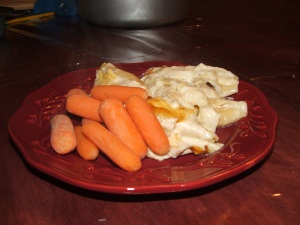
Let me warn you, this is not a low fat dish, there is really no way to make it low fat.  It is not gluten free or dairy free.  This is a good old fashion clog your arteries with goodness dish.  You will not need to have more than 3-4 shells (unless you are 17 year old boy who can devour about 10 of them in 30 seconds flat!) because they are so rich.  I most often serve with carrots or a green veggie. 

I originally got this recipe from a magazine 6-7 years ago but have doctored, played around and generally changed it so much I dont feel bad passing it off as my own.  I love to do that; do math on my recipes..  You know: add a little, subtract a little, multiply this or divide that.  Drives me boys nuts in someways.  “Mom what is the recipe?”  UMMMMMMM I dont know.. it started out *this* but now its *this*.  Its good for them.. keeps them on their toes and teaches them to try new things some times.

First a note about cheese.  I very seldom buy preshredded cheese for anything other than tacos (or for Rob and the kids to use).  When I am cooking I buy the one pound blocks of mozzarella, the 8 oz blocks of cheddar and I never buy canned or ready grated hard italians.  Part of what keeps those shreds from clumping is a de-clumping agent, sometimes natural products but it isnt cheese.  I am paying for cheese, I want cheese!  So take the time and grate it or shred it yourself.  It tastes better and is more cost effective.  Already shredded cheese is generally more expensive because of the convenience factor.. seriously a 1 lb block of cheese takes 2 minutes to shred.. and it is a dollar more in some stores.   You do the math!

Ingredients

2 boxes of  jumbo shells
2 jars of your favorite alfredo sauce (can do low fat, but I’ve yet found one I like)
1/2 cup milk
6-7 grates fresh nutmeg (can use 1/4 tsp ground but the fresh is so much better)
2 tsps ground sage
1 15 oz container of part skim ricotta
1 egg
10-12 grates of fresh nutmeg (or about 1/2 tsp ground)
2 1/2 cups of your squash (or store bought) with any extra fluid drained off
3/4 cup shredded cheddar cheese
1/2 cup grated fresh parmesan or other hard italian cheese (optional)
2-3 cups shredded mozzarella

First boil your noodles in salted water. (see note about salted water below***)  And drain well and put aside to cool slightly.


In a seperate bowl mix the alfredo sauce,  milk, nutmeg and sage.  Mix thoroughly and set aside.


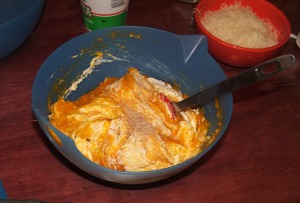
Mix your filling together which consists of the ricotta, egg, squash, 1/4 cup of the shredded cheddar and 1/4 cup of the parmesan.  Mix together until smooth.
 

Now it is time to stuff!  This is a blast, the kids and I do this part.  They always over fill but after a few gentle reminders they get better.  Spread alittle of the sauce in the bottom of your greased 9 x13 pan.   I use one metal one for dinner and then another aluminum one to get in the freezer.   
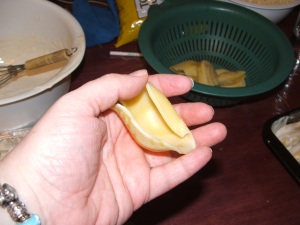

You want to fill them so that you can almost fully close them.   Then lay them with the opening facing the side.  Fill up and cover with half of your sauce (remember this makes two pans).  You should make sure that the sauce is on all the shells so you might have to pull it out of the crevices between the shells. 
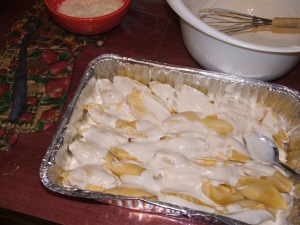
Take the remaining 1/2 cup cheddar, 1/4 cup parm and 2-3 cups mozzarella and cover the shells.

Bake at 350 for about an hour until bubbly or the drooling has gotten so bad you cant stand it.    It comes out all yummy with crunchy cheese around the edges!
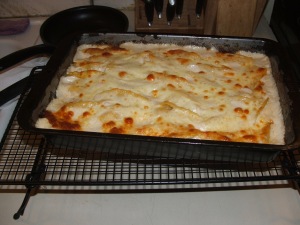
Serve with your favorite veggie and some nice crusty bread.   So tasty..
*** There is some controversy about salting your pasta water but i did a little experiment after something I saw on a cooking show.  I boiled pasta one night in salted water (1 tbsp kosher salt in 10 cups of water adding one pound pasta) and served it with just butter and pepper, no one person added salt.  The following week made it with no salt in the water and both of the kids added salt and it was much more salt than what the pasta had in it from the water.   Cool huh!!  Now if you are on a restricted salt diet please omit.

I love this recipe. It is fun to make, not too hard and other than a bit time consuming, so worth it.  Rob doesnt eat squash (neither will the boys but they will eat this) so when I make this I make two lasagnas or two stuffed italian shells as well. The kids eat both so there works out to be enough for dinner and a couple lunches for Rob and I.  Ihope you try it and love it as much as I do.

Happy Cooking!